


How to Apply Removable Wallpaper: Easy Step-by-Step Guide

Why Removable Wallpaper Is Your Perfect Design Ally
Removable wallpaper has become incredibly popular in New Zealand interior design. It offers a great mix of style and flexibility, perfect for updating your space without the commitment or difficulty of traditional wallpaper. This is especially helpful for renters facing restrictions on permanent decor. Imagine transforming a plain rental bach into a stylish coastal escape with vibrant, removable wallpaper featuring native pōhutukawa flowers. It's a simple way to add personality without risking your bond.
Freedom and Flexibility in Design
Removable wallpaper is a game-changer for those who like to change things up. It's perfect for refreshing your home regularly or trying out bold patterns and colors. You can easily switch your wallpaper with the seasons or update a child's room as they grow. This kind of adaptability isn't possible with traditional wallpaper.
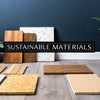
Sustainability Meets Style
Environmentally conscious Kiwis will appreciate the sustainable aspects of removable wallpaper. Many brands now use eco-friendly materials and inks, reducing their impact on the environment. This fits perfectly with New Zealand's increasing focus on sustainability and DIY projects. The global market for removable wallpaper was valued at approximately USD 1.78 billion in 2022. It's expected to grow at a CAGR of 3.5% until 2032, thanks to its ease of use and reusability. This growth is likely to be reflected in New Zealand as well. Find more statistics here: Removable Wallpaper Market.
Removable vs. Traditional: A Surprising Winner
The advantages of removable wallpaper go beyond renters and temporary design choices. Even homeowners find it a better option in some cases. Think about adding a feature wall to your living room. Removable wallpaper allows you to create a dramatic look without the messy paste and long-term commitment. Enjoy a stunning design refresh without the hassle of extensive preparation or difficult removal later. You might be interested in: How to master your DIY projects.
A Design Solution for Every Kiwi Home
From modern city apartments to classic villas, removable wallpaper offers a design solution for every Kiwi home. Its versatility lets you express your unique style, whether you prefer a subtle textured finish or a bold, graphic print. So, if you're renting, looking for a quick update, or simply want the freedom to change your mind, removable wallpaper is the perfect design partner.
Gathering Your Toolkit: What You'll Actually Need
Before you dive into the exciting world of removable wallpaper, it's crucial to assemble the right tools. Just like a skilled craftsperson, having the proper equipment can transform a potentially frustrating project into a smooth and satisfying experience. This guide, drawing on insights from both professional installers and passionate DIY enthusiasts across New Zealand, will walk you through everything you need.
Must-Have Tools
These are the essentials, the absolute must-haves for a successful wallpaper installation. Skipping these could lead to less-than-stellar results.
-
Smoothing Tool: A high-quality smoothing tool, such as a plastic smoother or a squeegee, is vital for eliminating air bubbles and achieving a flawless finish. This tool is your secret weapon against a bumpy, uneven look.
-
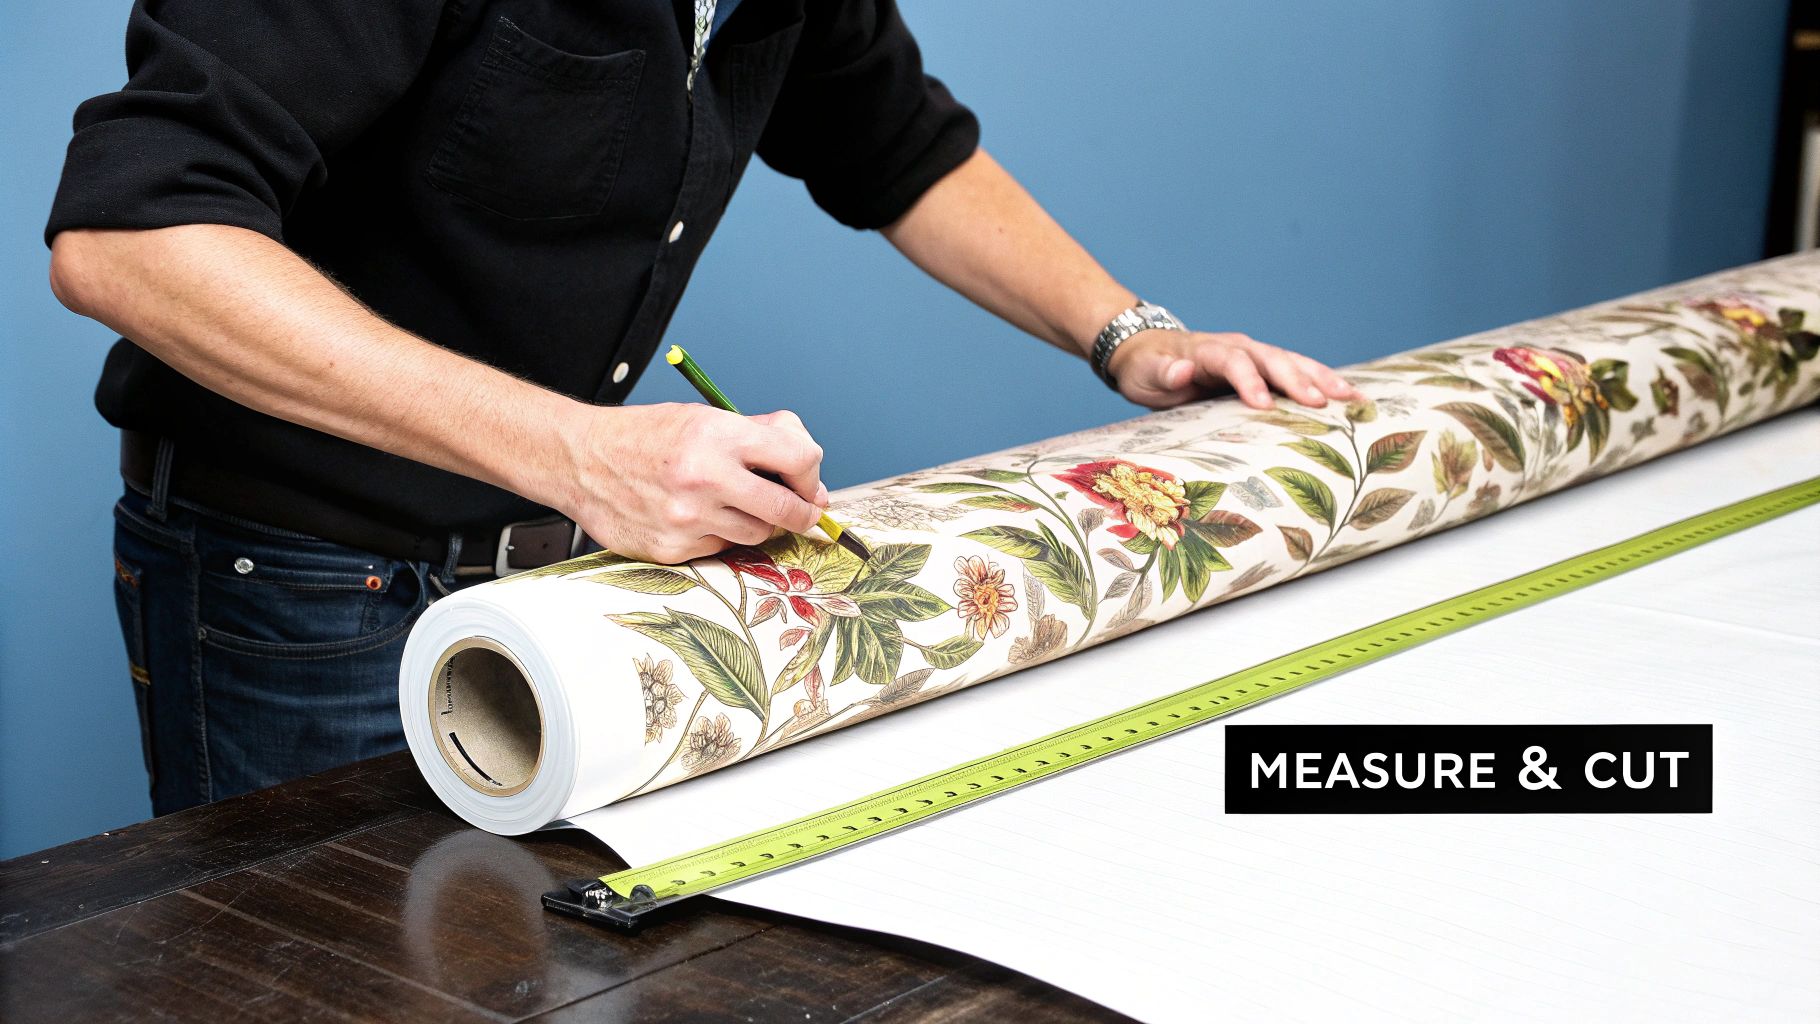
Measuring Tape and Pencil: Accurate measurements are paramount to avoid costly errors and wasted wallpaper. This is especially important when using patterned designs. Precise cutting and placement depend on accurate measurements.
-
Sharp Utility Knife or Scissors: Crisp, clean cuts are key for a professional appearance. A sharp blade prevents tearing and ensures the wallpaper edges lie flat against the wall.
-
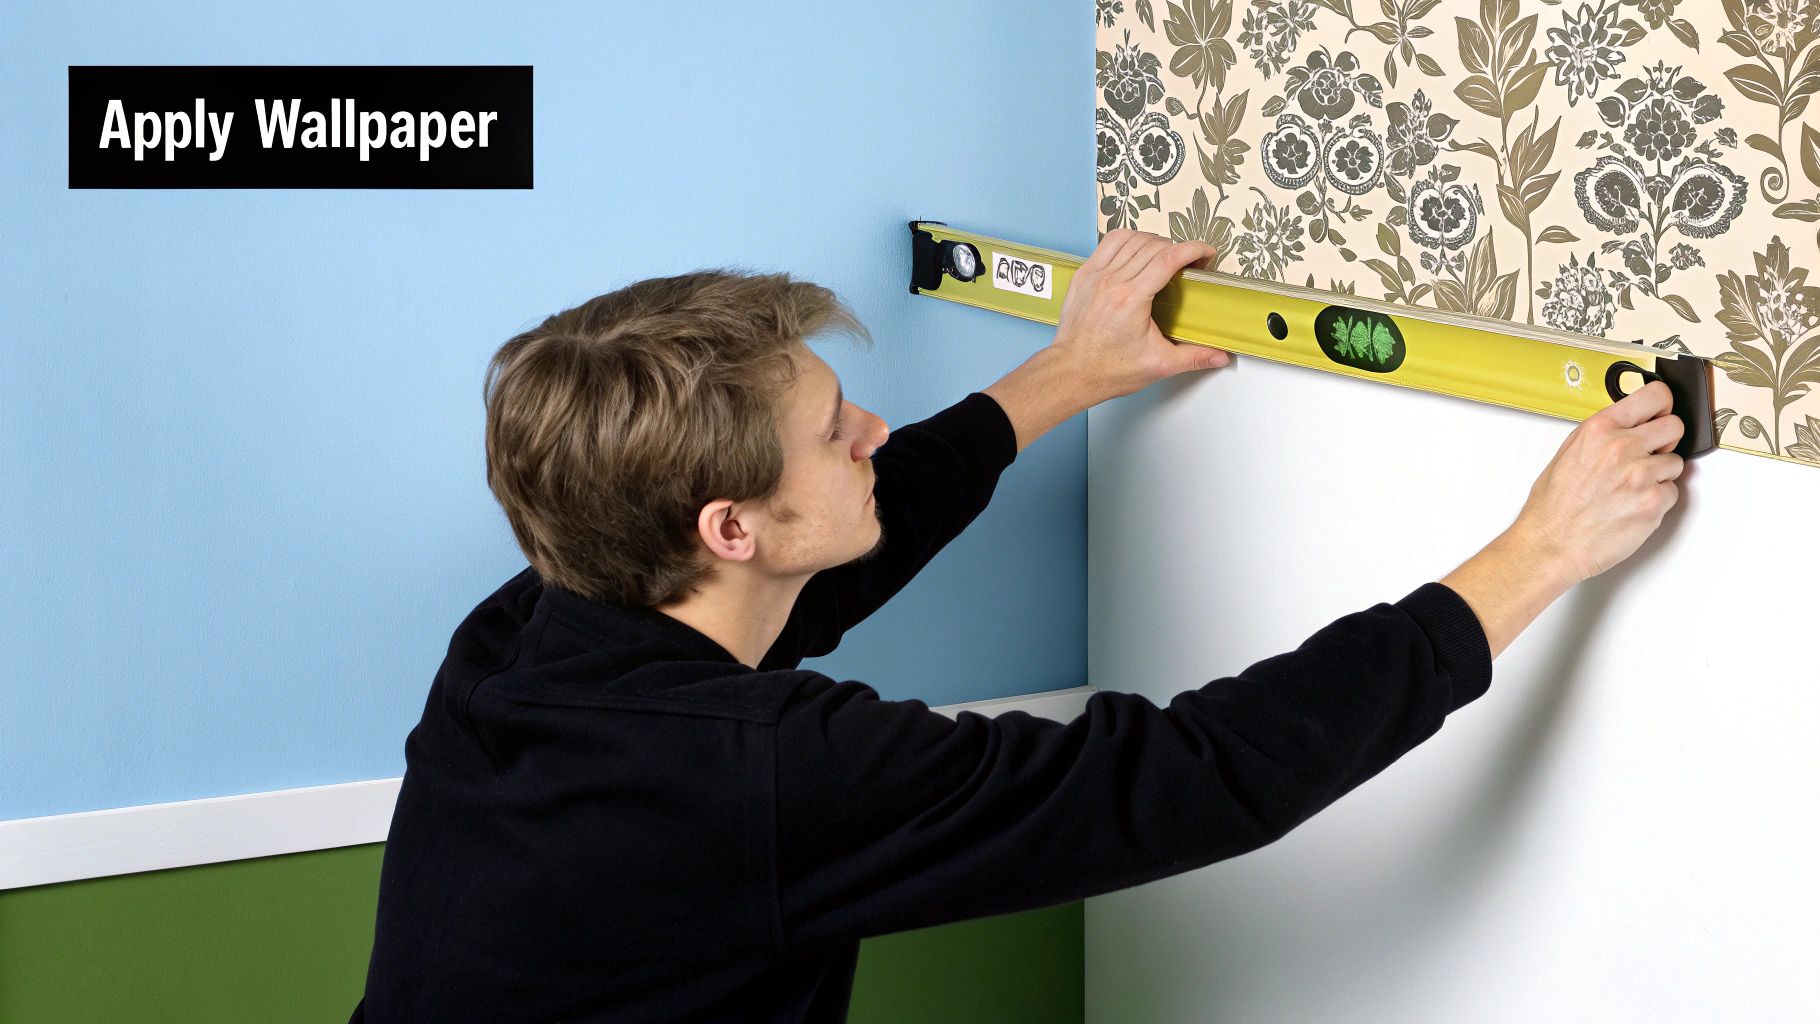
Level: Even a small level is essential for ensuring your first strip of wallpaper is perfectly vertical. This sets the standard for the entire project, preventing crooked lines and a wonky final result.
Optional But Helpful Tools
These tools, while not strictly required, can significantly streamline the application process and elevate your results.
-
Seam Roller: This handy tool helps to firmly adhere seams, which is especially important in humid environments like bathrooms. It creates a seamless, polished look.
-
Cutting Mat: A self-healing cutting mat protects your work surface and allows for cleaner, more precise cuts, particularly if you’re working on a delicate table or floor.
-
Soft Cloth: A clean, soft cloth is invaluable for wiping down the wall before application and smoothing out the wallpaper as you go.
Before we move on to the next stage, let's summarize the essential and optional tools in a handy table.
Essential Tools for Removable Wallpaper Application A comprehensive list of must-have and optional tools for successful wallpaper application
| Tool | Purpose | Essential or Optional | NZ Availability |
|---|---|---|---|
| Smoothing Tool (Squeegee) | Pressing out air bubbles, ensuring smooth finish | Essential | Widely available at hardware stores like Mitre 10 and Bunnings |
| Measuring Tape and Pencil | Accurate measurements for cutting and placement | Essential | Widely available at hardware stores and stationery shops |
| Sharp Utility Knife or Scissors | Clean, precise cuts for a professional finish | Essential | Widely available at hardware stores and stationery shops |
| Level | Ensuring the first strip is perfectly vertical | Essential | Widely available at hardware stores |
| Seam Roller | Firmly adhering seams | Optional | Available at hardware stores or online retailers |
| Cutting Mat | Protecting surfaces and ensuring cleaner cuts | Optional | Available at stationery shops or art supply stores |
| Soft Cloth | Wiping down walls and smoothing wallpaper | Optional | Readily available |
Having the right tools at your disposal will significantly contribute to a successful wallpapering project. Make sure to gather these before you begin.
Sourcing Your Supplies
You can find most of these tools at your local Mitre 10 or Bunnings. For more specialized tools like a seam roller, consider checking online retailers. For more DIY tips and tricks, check out our article on how to master your DIY projects. If you're looking for inspiration and visualization tools, take a look at this article on Augmented Reality Room Design.
Now that your toolkit is assembled, we can proceed to the next critical step: preparing your walls. This often-overlooked step greatly influences the final outcome of your project.
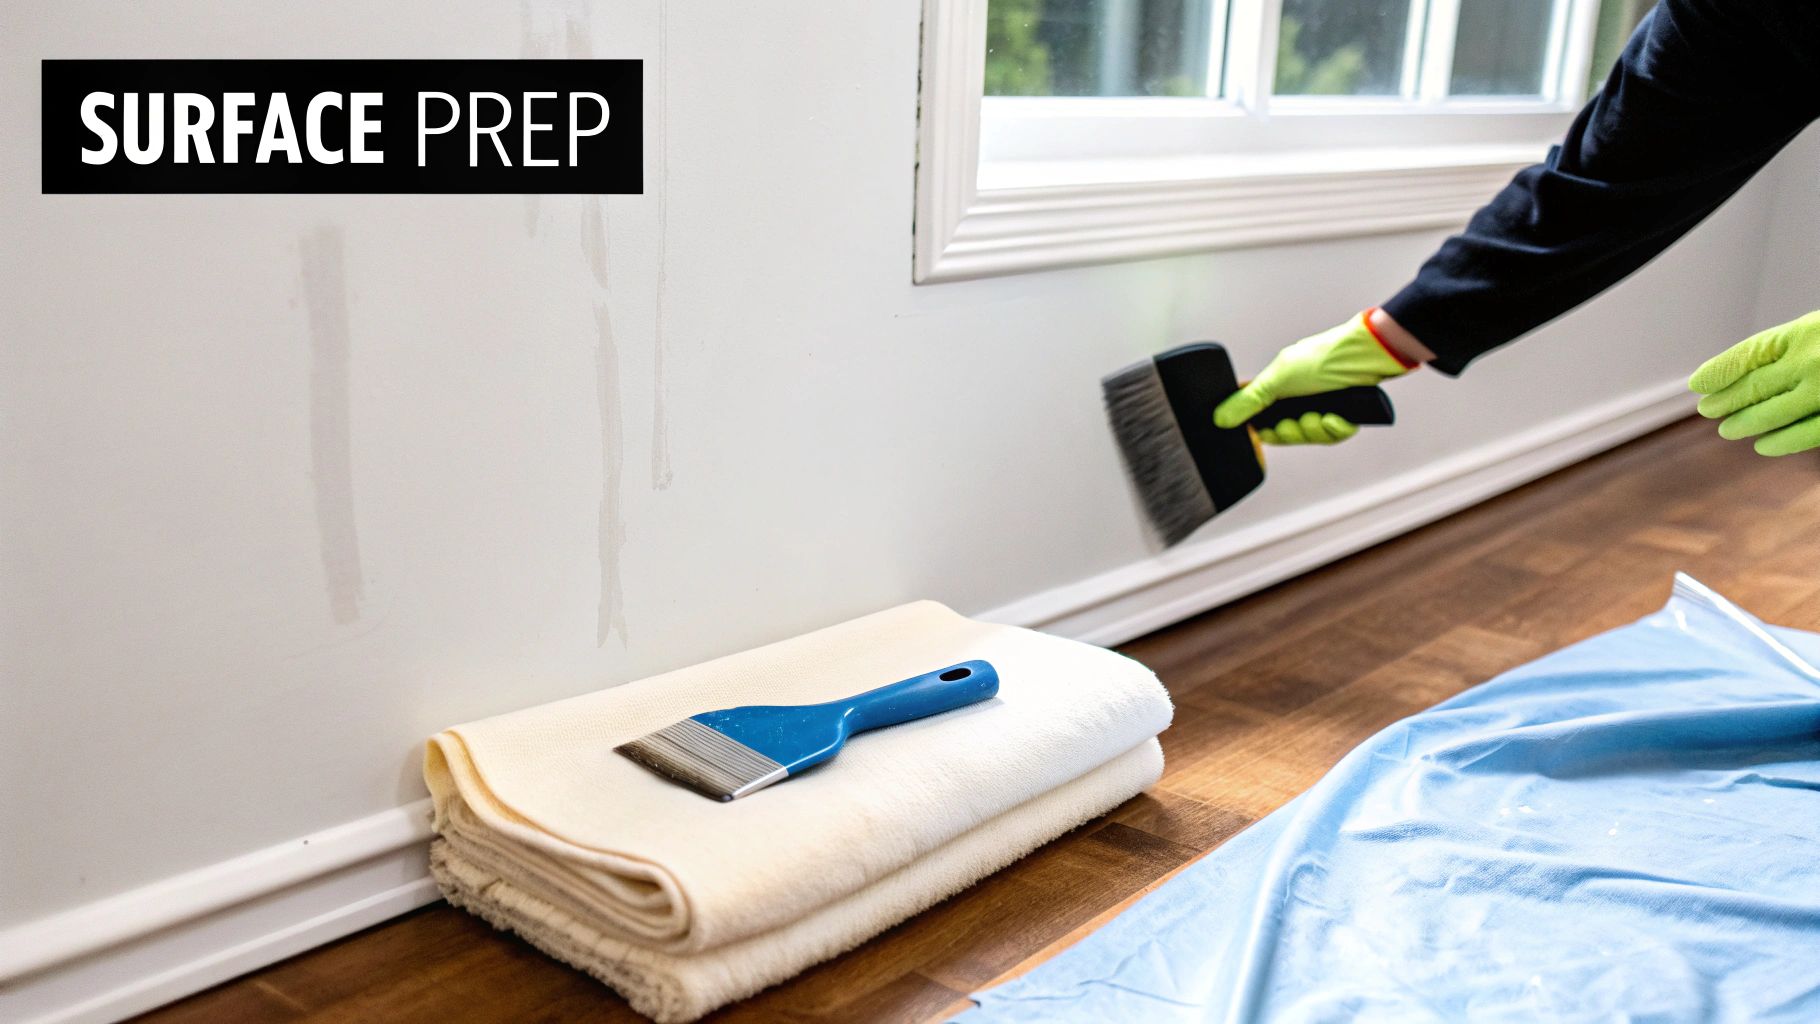
Wall Preparation: The Make-or-Break Foundation
The secret to beautiful, long-lasting removable wallpaper isn't just the application; it's the preparation. Wall prep is the crucial step that determines success. Think of it like preparing a canvas before painting a masterpiece. You wouldn't start on a dirty canvas.
Assessing Your Wall Surface: Know Your Canvas
Homes have various wall types, from smooth plasterboard to textured gib. Before applying wallpaper, assess your wall's surface. This determines the best preparation method.
Cleaning: A Fresh Start for a Flawless Finish
Cleaning your walls is crucial. Use a mild cleaning solution and warm water to remove dust, cobwebs, or grease. For stubborn stains, use sugar soap. Ensure the walls are completely dry before proceeding, as moisture affects adhesion.
Priming: The Unsung Hero of Wallpaper Adhesion
Priming creates a smooth, uniform surface for effective wallpaper adhesive bonding. This is especially important for patched or repaired walls. Accurate measurements are essential before starting. A helpful guide is available on How to Measure for Blinds: Quick & Easy Guide. A good primer seals the wall, preventing underlying issues like dampness from affecting the wallpaper.
Dealing with Unique NZ Wall Challenges
New Zealand homes, particularly coastal ones, often face higher humidity. This can affect wallpaper adhesion. Allow extra drying time for paint and primer. For textured walls in older homes, consider lining paper before wallpapering for a smoother surface.
Testing and Troubleshooting: Avoiding Costly Mistakes
Before applying wallpaper to the entire wall, test a small piece in a hidden spot. This checks adhesion and how the wallpaper looks against your wall color. Poor adhesion might indicate uncured paint. This is relevant in New Zealand, given the popularity of DIY. The paint, wallpaper, and supplies market, projected to reach US$764.94 million by 2025, underscores this trend. Find more market insights here.
The Payoff: A Smooth, Long-Lasting Wallpaper Installation
Proper wall preparation ensures smooth, bubble-free, and long-lasting wallpaper. A strong foundation is key. This preparation also makes removal easier, protecting your walls. This benefits both renters and homeowners.
The Step-by-Step Application Process That Actually Works
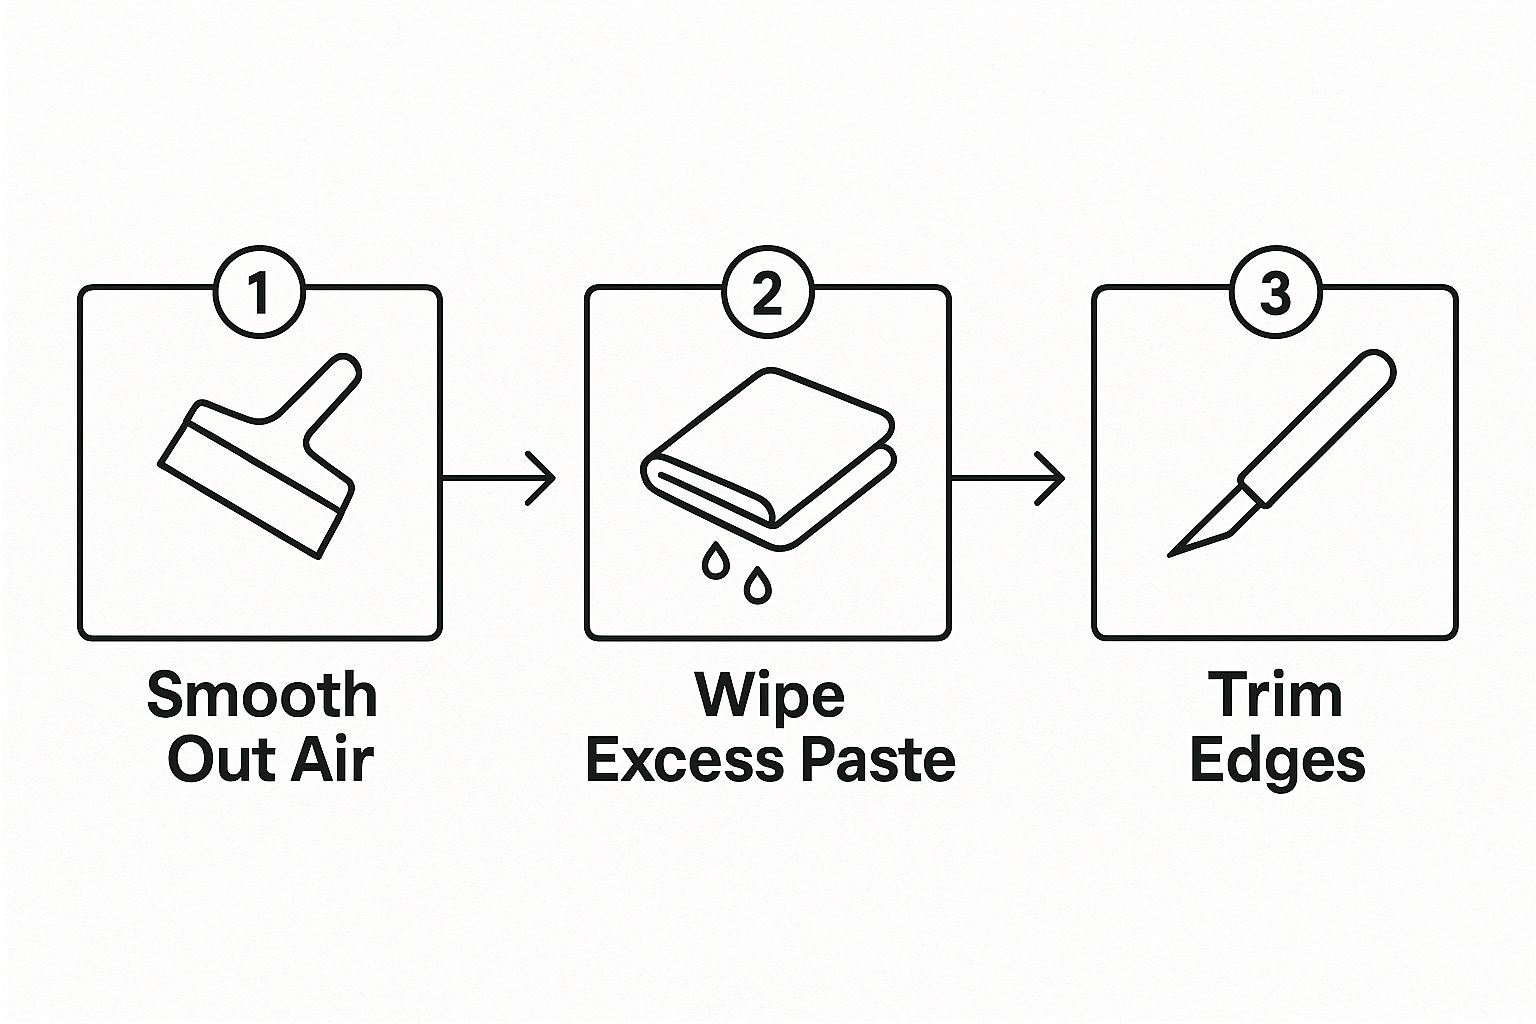
This infographic illustrates the three key steps for a perfect removable wallpaper application: smoothing, cleaning, and trimming. These seemingly simple actions are vital for achieving a professional look. Each step builds on the last, ensuring a flawless finish, from eliminating trapped air bubbles to achieving those crisp, clean edges.
Let's explore each stage of the process in detail. This is where your room truly transforms into a stylish, personalized space. Forget any wallpapering intimidation; this will be a rewarding DIY project.
Starting Smart: Choosing the Right Starting Point
Forget the corner! The best starting point isn't always the most obvious. Professional installers often recommend beginning near a focal point, such as a fireplace or large window, working outwards. This highlights the design feature and minimizes the impact of any minor pattern mismatches in less noticeable areas. Imagine showcasing a stunning view of the Southern Alps or a feature wall displaying native New Zealand artwork.
Pattern Perfection: Matching Like a Pro
With patterned wallpaper, precise matching is crucial. Before applying each new strip, carefully align the pattern with the previous one. This may involve slightly overlapping the edges, then using a sharp utility knife to create a seamless join. Patience is key here. A partner can make this process easier, helping to hold and align the paper, but it's certainly manageable solo.
Bubble Trouble: Banishing Wrinkles and Air Pockets
As you apply each strip, use your smoothing tool to firmly press out any air bubbles, working from the center outwards. A high-quality squeegee is essential here, preventing wrinkles and ensuring a smooth, even finish. Wipe away any excess paste with a damp cloth, especially around the edges. For more information about suitable tools, check out our product range.
Trimming the Excess: Achieving a Polished Look
Once the wallpaper is smooth and adhered, use a sharp precision blade to trim any excess along the ceiling, baseboards, and corners. This step creates those crisp, clean lines, giving your project a professional touch. It's a small detail that significantly elevates the overall look.
The Power of Two: Partnering Up for Success
While applying removable wallpaper is doable solo, a partner can be incredibly helpful, especially for larger walls or intricate patterns. One person can hold the wallpaper while the other smooths and aligns it, reducing installation time and ensuring a more seamless result. The global market for removable wallpaper is trending towards these easy-to-use options, especially in regions like Oceania, including New Zealand. The growing focus on DIY home improvement and eco-conscious choices further strengthens this trend. Learn more about the removable wallpaper trends. This shift reflects a desire for personalized and adaptable home decor.
Conquering Tricky Spots Without Losing Your Mind
Applying removable wallpaper is usually pretty straightforward, but some areas can be tricky, even for experienced DIYers. This section tackles those difficult spots often found in New Zealand homes, from the ornate features of character villas to the sleek lines of modern builds. We'll give you the knowledge to handle these challenges and achieve a professional look.
Wrestling with Light Switches and Power Points
Light switches and power points are common wallpapering obstacles. The key is to turn off the power at the circuit breaker before starting. Then, apply the wallpaper over the fitting, making small relief cuts at the corners. Carefully cut around the switch or outlet using a sharp utility knife. Smooth the wallpaper down and replace the cover plate for a seamless look.
Framing Windows and Doors with Precision
Working around windows and doors requires accurate measuring and precise cutting. Measure the frame's dimensions carefully and mark these measurements on the wallpaper. Cut the wallpaper slightly larger than needed to allow for adjustments. Apply the wallpaper, smoothing it carefully around the frame. Trim any excess with a sharp blade for a clean, professional edge.
Tackling Uneven Corners and Textured Walls
Many older Kiwi homes have uneven corners or textured walls, which can create unique challenges. For uneven corners, overlap the wallpaper slightly and use a sharp utility knife to create a clean seam. For textured walls, lining paper can be incredibly helpful. Applying lining paper first creates a smoother surface for the removable wallpaper. It's similar to applying a smooth base coat before painting – it provides a better surface.
Knowing When to Persevere (and When to Pivot)
Sometimes, despite your best efforts, the wallpaper just won't cooperate. It's important to know when to keep trying and when to adjust your approach. If you're struggling with a tricky area, take a break and reassess. Maybe a small change, like using a smaller piece of wallpaper or adjusting the starting point, will fix the problem. If all else fails, don't be afraid to embrace the imperfection. A small wrinkle or slightly mismatched pattern in a hidden spot adds character. A professional installer once mentioned that some of his best work involved embracing unexpected issues and finding creative solutions.
Recovering from Mistakes: It’s Not the End of the World
Everyone makes mistakes, especially when trying something new. Luckily, removable wallpaper is pretty forgiving. If you see a bubble or wrinkle, carefully peel back the section and smooth it out. If a section gets damaged, a small patch of matching wallpaper can often fix it. Remember, the goal is to enjoy the process and create a space you love. A minor imperfection won't ruin the overall look of your newly wallpapered room. Check out some common troubleshooting tips below.
Here’s a helpful table summarizing some common issues and how to tackle them:
"Common Mistakes and Solutions When Applying Removable Wallpaper" "A breakdown of frequent errors and expert solutions for perfect application"
| Common Mistake | Why It Happens | How to Avoid It | Fix If It Occurs |
|---|---|---|---|
| Air Bubbles | Trapped air during application | Use a smoothing tool to push air out from the center to the edges. | Carefully peel back the area and reapply, smoothing out the air. |
| Wrinkles | Uneven application or pulling the wallpaper too tight | Apply the wallpaper smoothly and avoid stretching. | Peel back the wrinkled section and reapply it, ensuring it lies flat. |
| Mismatched Pattern | Incorrect alignment | Carefully align the pattern before applying each new strip. | If possible, use a matching piece of wallpaper to patch the area. |
| Peeling Edges | Insufficient adhesion or wall preparation | Ensure the wall is clean and smooth. Use a primer) if necessary. | Apply wallpaper adhesive to the back of the peeling edge and press firmly. |
With these tips and tricks, you'll be ready to handle those tricky spots and transform your space. Now that you've mastered the application process, let's look at how to maintain your wallpaper and remove it without damaging your walls.
Maintaining Your Masterpiece (And Removing Without Damage)
Your newly wallpapered walls are truly a work of art. And just like any masterpiece, they require the proper care. This guide offers practical tips for maintaining your removable wallpaper in New Zealand's varied climates, from Auckland's humid summers to the South Island's drier conditions. We'll cover effective cleaning methods, touch-up techniques for minor damage, and smart strategies for refreshing high-traffic areas. Finally, we'll walk you through the removal process, ensuring your walls stay in perfect condition, a particularly important point for renters.
Cleaning Your Removable Wallpaper: A Gentle Touch
Keeping your wallpaper looking its best requires the right cleaning techniques. Steer clear of harsh chemicals or abrasive cleaners, as these can harm the surface and weaken the adhesive. Instead, a gentle approach is best. A damp (not soaking wet) microfibre cloth is usually all you need for regular dusting and cleaning.
For stickier spots, a mild solution of dish soap and water can work wonders. Always test any cleaning solution on an inconspicuous area first. This ensures it won't affect the wallpaper's color or finish, much like testing paint samples before painting a whole room.
Repairing Minor Damage: Quick Fixes for Long-Lasting Beauty
Life happens, and sometimes your removable wallpaper might suffer minor damage like a small tear or scratch. Don't worry! A simple fix can often make it practically disappear. For minor tears, carefully align the edges and gently press them back together. For scratches or scuffs, a touch-up pen in a matching color can be a lifesaver. You might find some helpful tips in this article: How to master your next home project.
Refreshing High-Traffic Areas: Maintaining a Fresh Look
High-traffic areas like hallways and kids' rooms tend to experience more wear and tear. To keep these spaces looking their best, think about applying a clear, protective vinyl film over the wallpaper. This acts as a shield against scuffs and marks, prolonging the wallpaper's lifespan. This is especially helpful in rentals, where preserving the condition of the walls is key.
The Art of Removal: Preserving Your Walls
When you're ready for a change, removing your removable wallpaper should be easy. Start by gently peeling back a corner of the wallpaper. Slowly peel the wallpaper away from the wall at a 180-degree angle. This minimizes the chance of damaging the paint underneath, a crucial step for renters.
If you find the wallpaper stubbornly sticking, using a hairdryer on a low setting can help loosen the adhesive. Much like removing a sticker, applying gentle heat can smooth the process and prevent damage. As a bonus, some wallpapers are reusable, offering an added sustainable benefit.
Specialized Advice for Different Wall Types in NZ
Homes in New Zealand have a variety of wall types, each with its own considerations during wallpaper removal. For smooth plasterboard, removal is generally straightforward. However, textured walls, like those found in many older villas, require extra care to avoid pulling off the textured surface along with the wallpaper. Think of it like carefully peeling a sticker from a delicate surface – patience is essential.
Transform your space with Maak Home's beautiful range of removable wallpapers. Visit Maak Home to browse our collection and find the ideal design for your New Zealand home or business.
Article created using Outrank

