


Your Guide to Self Adhesive Wallpaper NZ
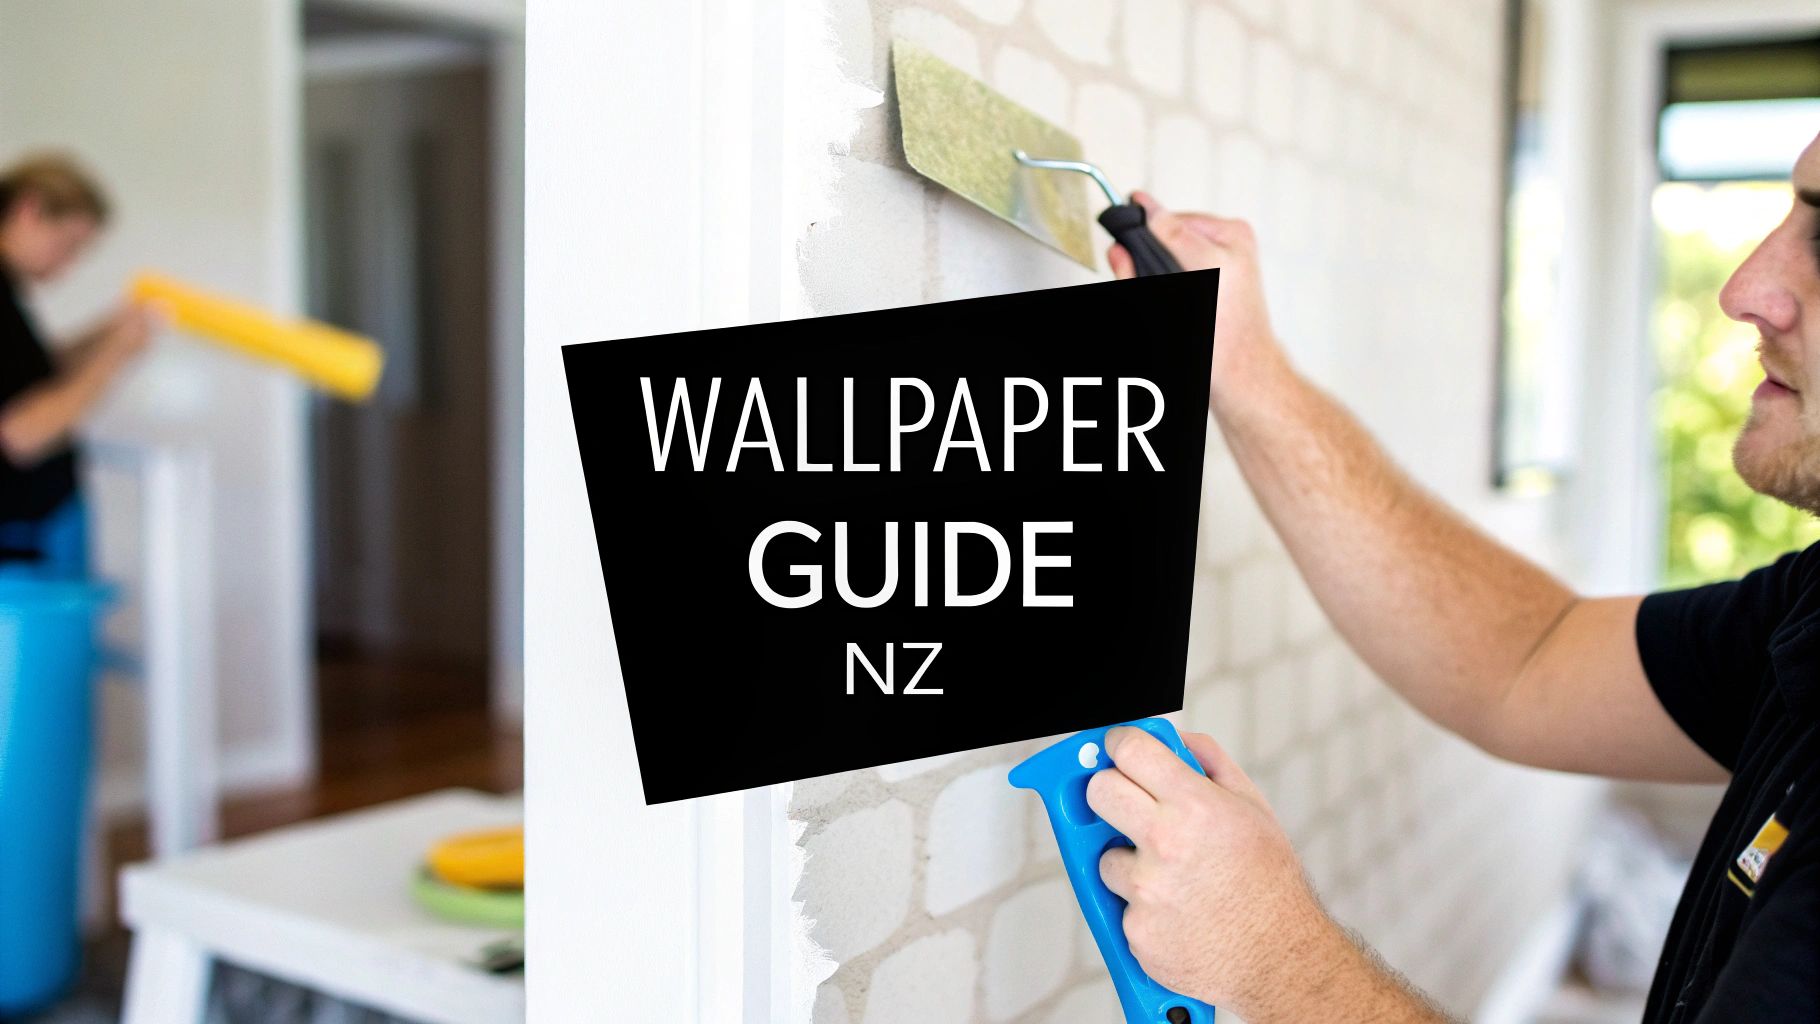
Tired of staring at four plain walls, wondering how to give your space a bit of a shake-up? Self-adhesive wallpaper is your answer. Forget everything you think you know about traditional wallpapering—the messy paste, the tricky alignment, the lifelong commitment. This is something entirely different. Think of it as a giant, beautifully designed sticker for your wall, ready to transform a room in an afternoon.
Welcome to the World of Removable Wallpaper
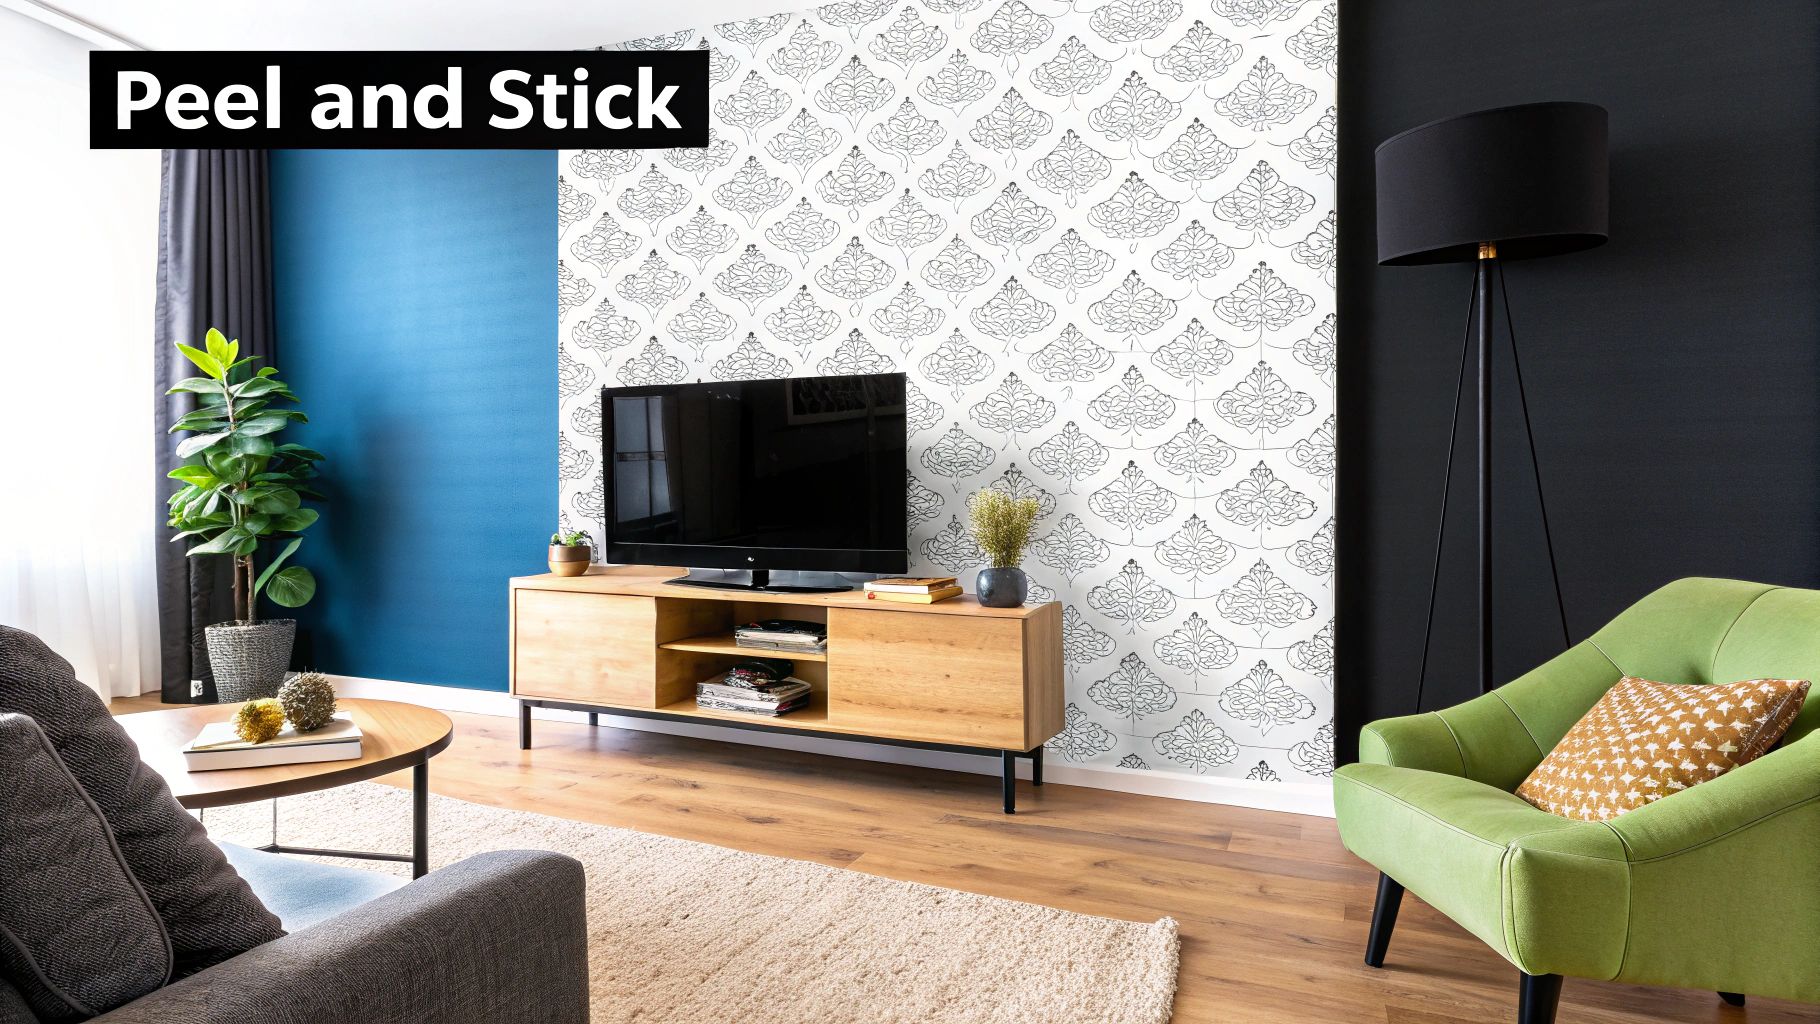
If you've ever felt trapped by bland walls—especially if you're renting or just someone who loves to switch things up—removable wallpaper is a game-changer. It’s designed to peel and stick directly onto your wall, smoothing down for a seamless finish that looks like it was done by a pro. The best part? When you're ready for a new look or need to move out, it peels right off without a hint of damage to the surface underneath.
This simple, DIY-friendly approach is making waves in home makeovers all across New Zealand. It’s a stunningly effective way to inject your personality into any room. You could create a dramatic feature wall in the lounge, add a pop of colour to your home office, or put up a playful pattern in the kids' room. The creative freedom is immense.
Why Is Everyone Talking About It?
The magic of self-adhesive wallpaper is how it combines simplicity with serious visual impact. It puts incredible interior design transformations within reach for just about anyone, no matter your DIY confidence or budget. This isn't just a niche product; it's part of a much bigger shift in how Kiwis are decorating their homes.
In fact, the wider paint and wallpaper market in New Zealand, which includes these peel-and-stick options, is projected to bring in around US$764.94 million in revenue by 2025. A huge part of that growth comes from our increasing desire for decorating solutions that are eco-friendly and sustainable. If you're interested in the numbers, you can dive deeper into these market trends on Statista.
The Bottom Line: You get a high-impact, low-commitment design tool that allows for creative expression without the mess, expense, or permanence of traditional wallpaper or paint.
It’s about more than just covering a wall; it’s about making a space feel completely yours, even if it’s just for a short while. This guide will walk you through everything you need to know, from choosing the right material to getting that installation just right.
Traditional vs Self-Adhesive Wallpaper At a Glance
To really get a feel for why modern self-adhesive wallpaper in NZ is taking over, it helps to see how it stacks up against the old-school method. Here’s a quick rundown of the key differences.
| Feature | Traditional Wallpaper | Self-Adhesive Wallpaper |
|---|---|---|
| Application | Requires separate adhesive, water trays, and booking time. Often messy. | Pre-glued backing. Simply peel and stick directly onto the wall. |
| Removal | Can be difficult, often requiring steamers and scrapers, and may damage walls. | Peels off cleanly and easily, leaving no residue or damage behind. |
| Best For | Permanent, long-term installations in owned homes. | Renters, feature walls, and homeowners who enjoy frequent decor updates. |
| Tools Needed | Paste, brushes, rollers, seam rollers, smoothing tools, cutting tools. | A simple squeegee (or credit card) and a craft knife. |
As you can see, the peel-and-stick approach strips away the hassle, making a stylish home accessible to everyone.
Choosing the Right Wallpaper Material
When you first dive into the world of self adhesive wallpaper in NZ, it can feel a bit like walking into a candy store—so many exciting options! But just like deciding between a long-lasting hard candy and a soft, chewy treat, the material you choose will have a huge impact on how your project turns out and how long it lasts. It’s about more than just the pattern; it’s about performance, feel, and whether it’s right for the room.
Making the right call from the start ensures your new wall covering not only looks incredible but can also handle the everyday reality of your home. A stunning design on the wrong material can lead to quick disappointment, so getting to know the key differences is the first step to a successful and beautiful transformation.
This explosion of choice isn't just happening here, either. Peel-and-stick wallpaper is booming globally, with the market projected to jump from USD 2.1 billion in 2023 to about USD 4.8 billion by 2033. New Zealand is right in the thick of this trend, as more Kiwis discover this easy and affordable way to decorate. If you're interested in the worldwide picture, you can explore more insights into the peel-and-stick wallpaper market.
Vinyl: The Durable Workhorse
When you need a wallpaper that can take a bit of a beating, vinyl is your champion. Think of it as the trusty raincoat of the wallpaper world. It’s tough, scrubbable, and often water-resistant, making it a fantastic choice for rooms that see a lot of action or moisture.
This resilience makes it perfect for certain spots in a Kiwi home:
- Kitchens: Where splashes from the sink or cooking splatters are a given, a wipeable vinyl surface is a sanity-saver.
- Bathrooms: It handles steam and humidity much better than other materials (though you’ll still want to avoid direct, heavy water contact).
- Kids' Rooms and Hallways: These high-traffic areas are perfect for a surface that resists scuffs and can be easily cleaned of grubby fingerprints.
Vinyl wallpapers also come in a massive range of finishes, from glossy sheens that bounce light around a dark room to more understated matte looks. It’s a seriously practical and versatile option that delivers both looks and longevity.
Fabric: A Touch of Luxury
If vinyl is the practical raincoat, then fabric wallpaper is the custom-tailored wool coat—it brings texture, depth, and a real sense of sophisticated warmth to a space. Fabric-based materials, like the premium polyester we use at Maak Home, offer a much more high-end, tactile experience.
The woven texture lends a softness to a room that a printed vinyl just can’t match. This makes it an amazing choice for creating a cosy and inviting atmosphere.
Key Takeaway: Fabric wallpapers are perfect for spaces where you want to dial up the elegance and comfort. They can turn a simple feature wall into a rich, textural centrepiece that you can’t help but want to reach out and touch.
Consider using a fabric-based self-adhesive wallpaper in these areas:
- Living Rooms: To create a warm, welcoming feature wall behind the sofa.
- Bedrooms: For a serene and luxurious backdrop behind the headboard.
- Home Offices: To give the space a professional yet comfortable and inspiring feel.
While not as aggressively scrubbable as vinyl, high-quality fabric wallpapers are still quite durable and easy to look after with a bit of gentle cleaning.
Understanding Finishes and Textures
Beyond the base material, the finish is what really shapes the final look. Just think about how the same paint colour looks completely different in matte versus gloss—it’s the same with wallpaper. The finish interacts with light and sets the mood for the entire room.
- Matte Finish: Gives you a flat, non-reflective surface that’s great at hiding minor lumps and bumps on the wall. It creates a soft, modern feel.
- Satin or Sheen Finish: Has a slight gloss, making it more wipeable and durable than matte. It adds a subtle, gentle glow to the walls.
- Gloss Finish: Highly reflective and very durable. It makes a bold statement but be warned—it will highlight any imperfections on the wall underneath.
- Textured Finish: Materials like woven fabric or embossed vinyl add actual physical depth to your walls, creating visual interest and a high-end feel.
By thinking about both the material and the finish, you can pick the perfect self adhesive wallpaper in NZ to bring your vision to life, making sure it’s every bit as practical as it is beautiful.
Your Guide to a Flawless Installation
Ready to get your hands dirty and bring that design to life? This part of the guide is all about getting a professional-looking finish without the usual stress. Putting up self adhesive wallpaper in NZ is a lot more straightforward than you might think. Honestly, it's less of a daunting reno project and more like a satisfying, large-scale craft.
We'll walk through the process step-by-step, building your confidence as you go. With the right gear and a clear game plan, you'll get a seamless result that looks like you hired a pro.
Preparing Your Wall for Success
You wouldn’t paint on a grubby canvas, right? The same logic applies here. The most critical step for a perfect finish is getting your wall surface just right. A clean, smooth wall is key to helping the wallpaper’s adhesive get a solid, even grip.
First things first, give the wall a good wipe-down. A damp cloth and a mild, non-abrasive cleaner will do the trick, getting rid of any dust or grime that could get in the way. Let it dry completely before you even think about peeling off that backing paper. If you're working with freshly painted walls, you absolutely must wait at least four weeks for the paint to fully cure. Putting wallpaper up too soon can trap gases from the curing paint and cause annoying bubbles to form later.
Finally, run your hand over the wall. Feel any bumps, holes, or rough spots?
- Fill any wee cracks or holes with a bit of spackle.
- Sand down any bumps until the surface feels perfectly smooth.
- Wipe away any dust from sanding with a clean, dry cloth.
This little bit of prep work is your best insurance against lumps and peeling edges down the track.
Gathering Your Essential Tools
You don't need a tradie's full toolkit for this job, but having a few key items will make everything so much easier and give you a much cleaner result.
Your Installation Checklist:
- Measuring Tape: To get your wall and wallpaper panel measurements spot-on.
- Pencil: For lightly marking your measurements and guide-lines on the wall.
- Sharp Craft Knife: A fresh, sharp blade is non-negotiable for clean, precise cuts around power outlets and edges.
- Squeegee or Smoothing Tool: A simple plastic squeegee is perfect for smoothing out the paper and pushing out air bubbles. A credit card will do in a pinch!
- Level or Plumb Bob: To make sure your first panel is perfectly straight. Don't just eyeball it—walls are almost never perfectly square!
Once you’ve got these bits and pieces ready, you’re all set for a smooth installation.
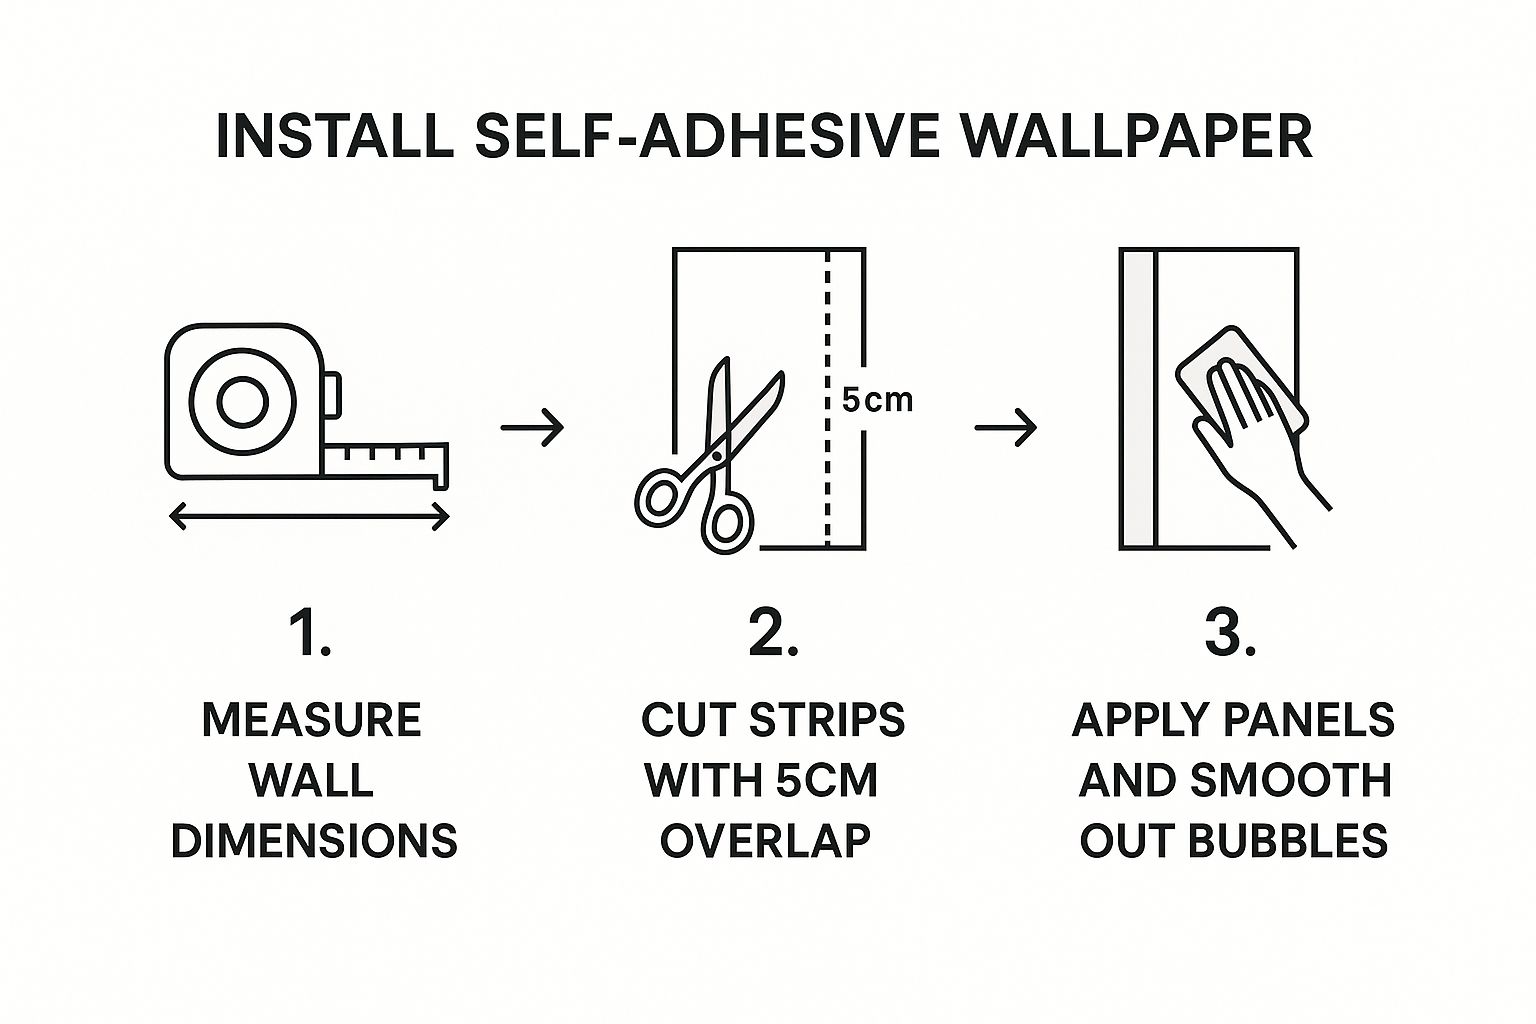
As you can see, success really comes down to being methodical with your prep and application. Taking the time to size each panel correctly and smooth it on carefully makes all the difference.
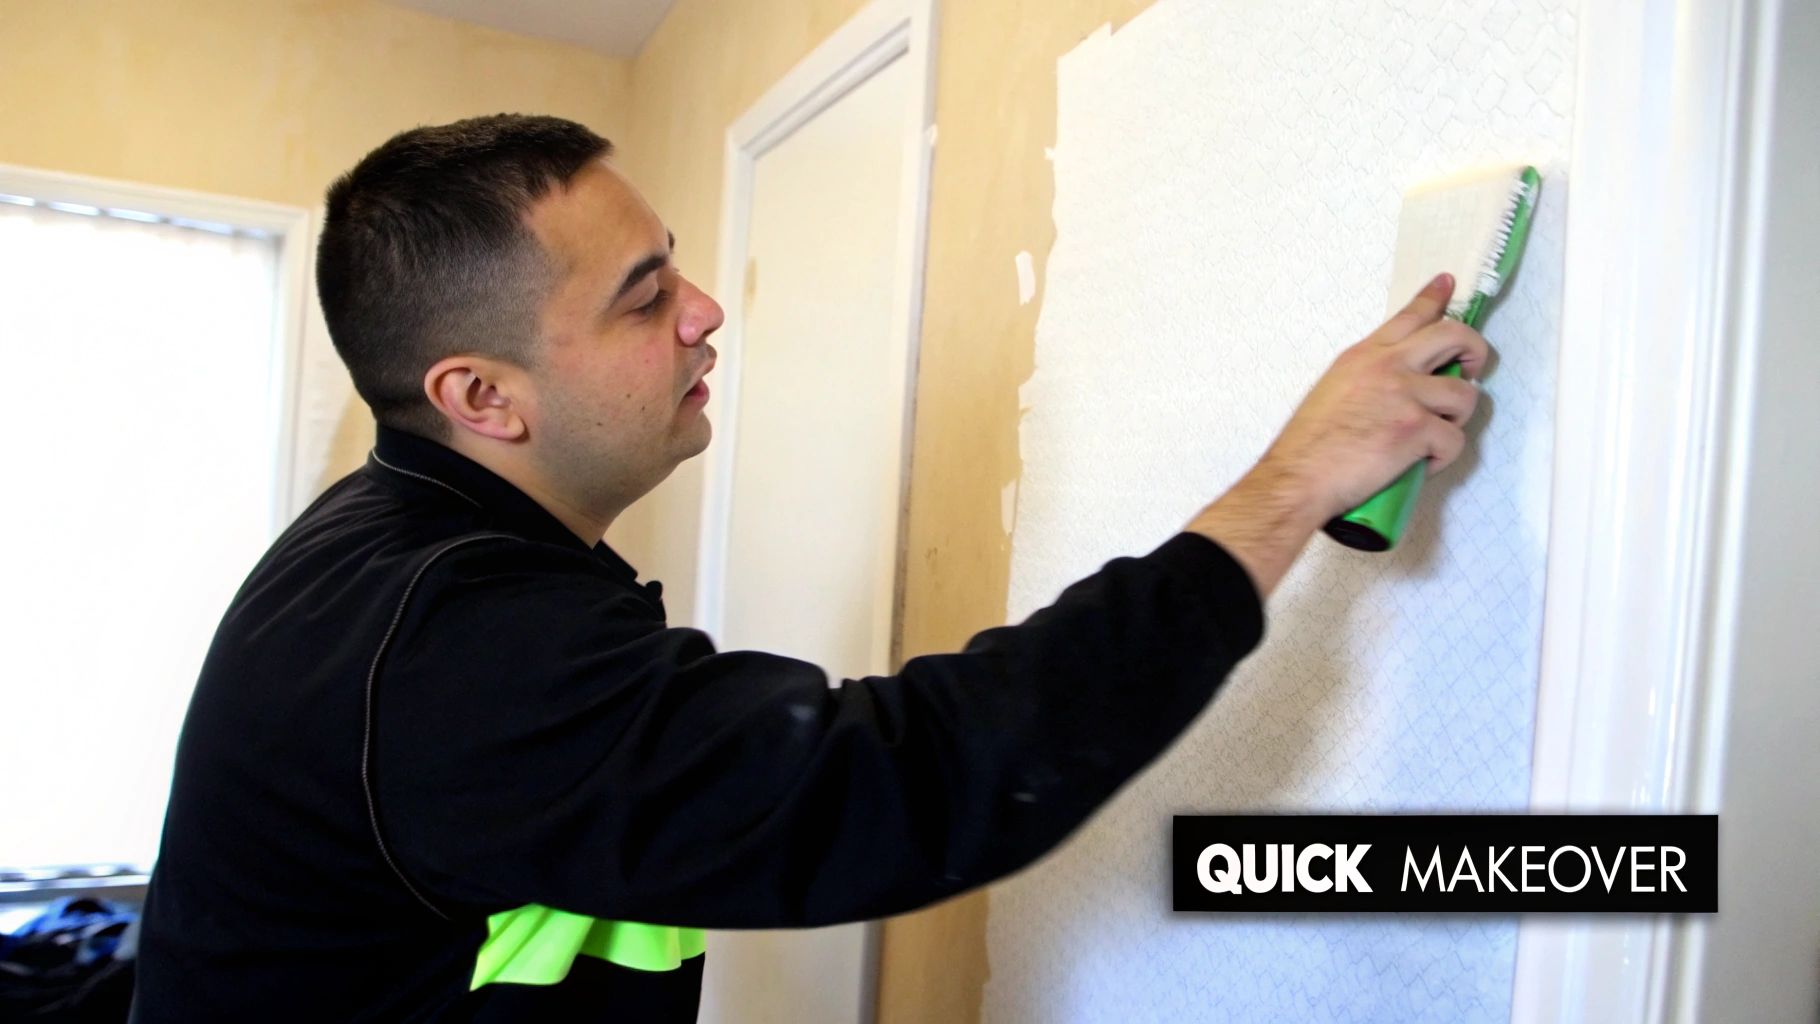
Applying Your Wallpaper Panels
This is where the magic happens. The trick is to work slowly and methodically, one panel at a time. It's often best to start in a top corner that’s a bit less noticeable. Use your level to draw a faint vertical line down the wall where the edge of your first panel will sit. This guideline is your secret weapon for a perfectly straight start.
Peel back just 15-20cm of the backing paper from the top of the panel. Whatever you do, don't peel it all off at once—the sticky side can easily fold over on itself or pick up every speck of dust in the room. Line up the top edge of the wallpaper with the ceiling, using your vertical line as a guide.
Pro Tip: Once the top is stuck, use your squeegee to smooth the wallpaper onto the wall. Always work from the centre outwards, pushing any air bubbles toward the edges. This simple technique is the best way to stop bubbles from getting trapped.
Keep pulling the backing paper down in small sections, smoothing as you go. When you add the next panel, overlap it slightly (check the instructions, but it's usually 1-2cm) to make sure the pattern lines up seamlessly. And if you muck it up? Just gently peel the panel back and try again. That’s the beauty of removable wallpaper! For a really detailed look at this stage, check out our easy step-by-step guide on how to apply removable wallpaper.
After all the panels are up, grab your sharp craft knife and carefully trim the excess paper along the ceiling, skirting boards, and around any corners. Take your time on this final step to get those crisp, professional edges that really finish the look.
Creative Design Ideas for Your Home

Alright, you've got the lowdown on materials and installation. Now for the really fun part—letting your creativity run wild. Self-adhesive wallpaper is so much more than just a wall covering; it’s a design tool that can completely transform the feel of a room. So, let’s think beyond just papering four walls and start seeing it as a flexible, artistic medium for your Kiwi home.
With the right pattern and placement, you can direct the eye, craft a certain mood, or even tell a story. This section is all about sparking a bit of inspiration and showing you how self adhesive wallpaper in NZ can help you make a personal statement, whether you’re aiming for a bold, dramatic shift or a subtle, elegant touch.
And it's not just a niche trend. Here in New Zealand, peel-and-stick wallpaper is a big deal, with shipment volumes hitting around 2,925,466 units. That gives it a solid 11% market share in its category, which really shows how many Kiwis are embracing it for their home projects.
Create a Stunning Feature Wall
The classic feature wall is a brilliant way to dip your toes into the world of pattern and colour without it taking over the entire space. It acts as a focal point, anchoring the whole room's design. In a living room, imagine a wall behind the sofa with a dramatic botanical print or a sharp geometric design—it adds instant depth and personality.
In a bedroom, a calming, textured wallpaper behind the headboard can create a cosy, sanctuary-like atmosphere. The trick is to pick a wall that naturally grabs your attention, like the one you see first when you enter the room or the one that features your main piece of furniture.
Energise Small or Awkward Spaces
Self-adhesive wallpaper is an absolute game-changer for those often-forgotten nooks and crannies. In fact, small spaces are the perfect canvas for making a really bold statement.
- Entryways and Hallways: A vibrant pattern can turn a purely functional hallway into a genuinely welcoming part of your home.
- Powder Rooms: Go for it in the smallest room of the house! A quirky or luxurious print can make a tiny bathroom feel like a little jewel box.
- Laundry Rooms: Who says chores have to be done in a drab space? A cheerful wallpaper can make your laundry area feel less like a forgotten corner and more like a considered part of your home.
These smaller jobs are also a fantastic way to test out a pattern you love but might be a bit nervous to use across a large wall. For more tips on making over temporary spaces, have a look at our guide on 7 renter-friendly wallpaper ideas to transform your space.
Think Beyond the Wall with Upcycling
One of the most creative ways to use self-adhesive wallpaper is to look past the walls altogether. It's an incredible tool for upcycling tired furniture and adding a bespoke touch to everyday items, giving them a whole new life.
Design Tip: Applying wallpaper to unexpected surfaces creates a cohesive, high-end look. It’s a designer’s trick for thoughtfully repeating elements to tie a whole room together.
Why not try one of these clever DIY projects?
- Bookshelf Backing: Pop a pattern onto the back panel of a bookshelf. It gives you a splash of colour and design that peeks out from behind your books and treasures.
- Drawer Fronts: Give an old chest of drawers or a dresser a serious facelift by covering the fronts with a stylish print. It’s a lot less hassle than sanding and painting!
- Stair Risers: Add a lovely surprise to your staircase by applying a durable, patterned wallpaper to the vertical risers.
These small projects are easy on the wallet and let you create truly one-of-a-kind pieces that perfectly complement your room’s aesthetic. It’s all about making your home a true reflection of you, one creative detail at a time.
Discover Custom Designs with Maak Home
Off-the-shelf designs are great, but what if you're after something that’s genuinely you? Imagine turning a treasured family photo, your kid's latest masterpiece, or even your own artwork into a breathtaking wall mural. This is where working with a local New Zealand provider like Maak Home can take your project from a simple refresh to a deeply personal design statement.
When you go beyond standard patterns, you open up a whole world of possibilities. It’s about creating a space that doesn’t just look nice but tells your story, ensuring your home is a true one-of-a-kind.
Your Vision, Your Wallpaper
Bringing a custom wall covering to life is a lot simpler than you might think. You don't need to be a graphic designer to get started. With Maak Home, you can take any high-resolution photo or digital art file and have it transformed into a beautiful, self-adhesive wallpaper.
It’s an ideal solution for so many ideas:
- Create a stunning feature wall in the living room from a favourite holiday landscape shot.
- Design a magical, whimsical mural for a child's bedroom using their own colourful drawings.
- Produce branded walls for a café or office that perfectly capture your business’s vibe.
It’s an incredible way to guarantee the final result is meaningful and totally original. If you're curious, you can find out more about how to transform any room with personal style using custom wallpaper in NZ. This really puts you in the designer's seat.
The Maak Home Quality Difference
When you're creating a custom piece, the print quality is only half the story; the material itself is just as crucial. A beautiful image on a flimsy material simply won’t do your vision justice. At Maak Home, we use a premium, self-adhesive woven fabric that really sets the standard for self adhesive wallpaper in NZ.
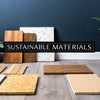
This material isn’t just about looking good—it's about being good for your home. It’s a non-toxic, PVC-free polyester fabric, which makes it a much healthier choice for your indoor spaces, especially in bedrooms and nurseries.
Key Advantage: Unlike many peel-and-stick options that are single-use, this high-quality fabric is also reusable. If you move house or just fancy a change, you can carefully peel it off the wall and reapply it somewhere else. This makes it a smart, flexible, and sustainable choice for the long run.
The Benefits of Buying Local
Choosing a Kiwi company like Maak Home for your wallpaper has some real practical upsides. Buying local means you’re not just getting a product off a shelf; you're getting a dedicated partner for your project.
This local connection offers tangible benefits:
- Faster Shipping: Because your wallpaper is produced right here in Aotearoa, you get quick, reliable delivery across New Zealand. No long waits or guessing games with international shipping.
- Responsive Support: Got a question or a special request? You’ll be talking to a local team that gets it. Communication is straightforward, and we’re here to help.
- Locally Assured Quality: There’s real peace of mind knowing your wallpaper is made locally to high standards. We stand by our craftsmanship, ensuring you receive a product you can be proud of.
Working with Maak Home is more than just a transaction. It’s a collaboration with a creative studio that’s passionate about helping you bring a personal, high-quality vision to life in your home.
Keeping Your Wallpaper Looking Its Best (and Removing It Without a Fuss)
One of the biggest draws of modern self adhesive wallpaper in NZ is just how easy it is to live with. From everyday cleaning to the day you decide on a new look, the entire experience is designed to be simple and stress-free.
Unlike old-school wallpapers that often required special cleaners and a lot of elbow grease, keeping your peel-and-stick wallpaper fresh is a breeze. For most of the durable vinyl options we offer, a quick wipe with a damp cloth and a bit of mild, non-abrasive cleaner is all it takes to deal with fingerprints, scuffs, or dust. This straightforward care makes it a fantastic, practical choice for high-traffic areas like hallways, kitchens, and kids' rooms.
If you've chosen a more delicate, premium material like a woven fabric, a gentler touch is needed. A light dust or a gentle pass with a dry microfibre cloth is usually enough to keep it looking perfect without harming the beautiful texture or print.
A Few Tips for Easy Upkeep
Think of it less as a chore and more as simple housekeeping for your walls. A little regular care goes a long way in keeping your design vibrant.
- Tackle Spills Quickly: If something splashes on the wall, just blot the spot gently with a damp cloth. Try not to scrub, as that can be too aggressive.
- Steer Clear of Harsh Chemicals: Stick to simple soap and water. Bleach, abrasive powders, and strong solvents can easily discolour the print or even weaken the adhesive over time.
- Dust Now and Then: A quick flick with a duster or a vacuum with a soft brush attachment is all you need to prevent dust from settling and dulling the colours.
That’s really all there is to it. This minimal effort ensures your feature wall stays looking as good as the day you put it up.
Key Insight: The real magic of removable wallpaper is its non-committal nature. It gives you total creative freedom to experiment, knowing you can change your mind whenever you like without a messy, expensive consequence. This is why it’s a game-changer for both renters and homeowners who love to redecorate.
The Simple, Damage-Free Removal Process
When you're ready for a change, this is where self-adhesive wallpaper truly proves its worth. Say goodbye to the steamers, scrapers, and frustrating wall damage that came with traditional wallpaper.
To take it down, just find a top corner and begin peeling the panel down and away from the wall at about a 45-degree angle. The trick is to go slowly and steadily, giving the adhesive time to release cleanly without tearing the paper or pulling off any paint.
If you hit a stubborn spot, a bit of gentle warmth from a hairdryer will soften the adhesive right up, making it even easier to peel away. The panel should come off in one piece, leaving your wall smooth, undamaged, and ready for its next chapter.
Common Questions About Self-Adhesive Wallpaper
It's completely normal to have a few last-minute questions before you dive into a decorating project. In fact, it’s a good sign! It means you’re thinking through the details.
We get asked these questions all the time, so let's clear them up. We’ll tackle the most common queries we hear about using self-adhesive wallpaper in NZ so you can move forward with total confidence.
Is It Truly Safe for Rental Properties?
Yes, absolutely. This is probably the number one reason peel-and-stick wallpaper has become so popular, especially for renters. A high-quality product, like the woven fabric wallpaper we make here at Maak Home, is designed specifically to peel off cleanly.
When it comes time to move out, it won’t damage the paint or the wall underneath, provided the wall was in decent shape to begin with. It’s the perfect way to make a space feel like your own, without risking your bond.
Can I Apply It to Textured Walls?
This is a great question, but the answer is nearly always no. For the adhesive to get a proper grip, it needs a smooth, clean surface to bond with. Think of it like trying to apply a sticking plaster over a bumpy or uneven patch of skin—it’s just not going to make full contact and will likely start peeling at the edges.
If your walls have a very light texture, you might be able to get away with it. But for anything more noticeable, like plaster swirls or a popcorn finish, the texture will prevent the wallpaper from sticking properly and will almost certainly show through the design.
Our Recommendation: If you’re set on wallpapering a textured wall, your best bet is to sand it back to a smooth finish first. A little bit of prep work upfront makes all the difference and ensures you get that professional, long-lasting look you're after.
How Does It Hold Up in Bathrooms?
You can definitely use self-adhesive wallpaper in a bathroom, but with a couple of important caveats. The key is choosing the right material and the right spot. A water-resistant vinyl wallpaper is your go-to here, as it’s built to handle humidity far better than fabric-based options.
The main thing to avoid is direct and constant water contact. Don't put it inside a shower or right behind a bath that doesn’t have a proper splashback.
A few smart ideas for bathroom placement include:
- Creating a stunning feature wall, well away from the main "splash zones."
- Decorating the wall behind the toilet or vanity.
- Using it in a powder room that doesn’t have a shower or bath.
The right pattern can also transform a space. For example, some designs and shades can make a small bathroom feel much bigger or help you concentrate in a home office. For more on that, check out our guide on using colours to keep you focused and productive.
Ready to bring your unique vision to life? Explore the endless possibilities with custom designs from Maak Home and create a space that’s truly your own. Discover our premium, locally made wallpapers today at https://www.maakhome.co.nz.
