


A Guide to Custom Fabric Printing NZ

Bringing your very own design to life on fabric is an incredible creative journey. Whether you're a fashion designer dreaming up a new collection, an interior stylist hunting for that perfect upholstery, or a crafter making a one-of-a-kind gift, custom fabric printing unlocks a world of potential. It’s all about having total creative control, making sure the final textile is a perfect match for your vision.
Your Vision, Printed on Fabric in New Zealand
Choosing to work with a local New Zealand provider is about so much more than just convenience. It’s about collaboration. When your printer is in the same time zone, communication is just easier and clearer, which helps sidestep any costly misunderstandings. You’re also putting money back into our local creative economy, which is so important for nurturing Kiwi design talent.
A Bright Spot in a Changing Industry
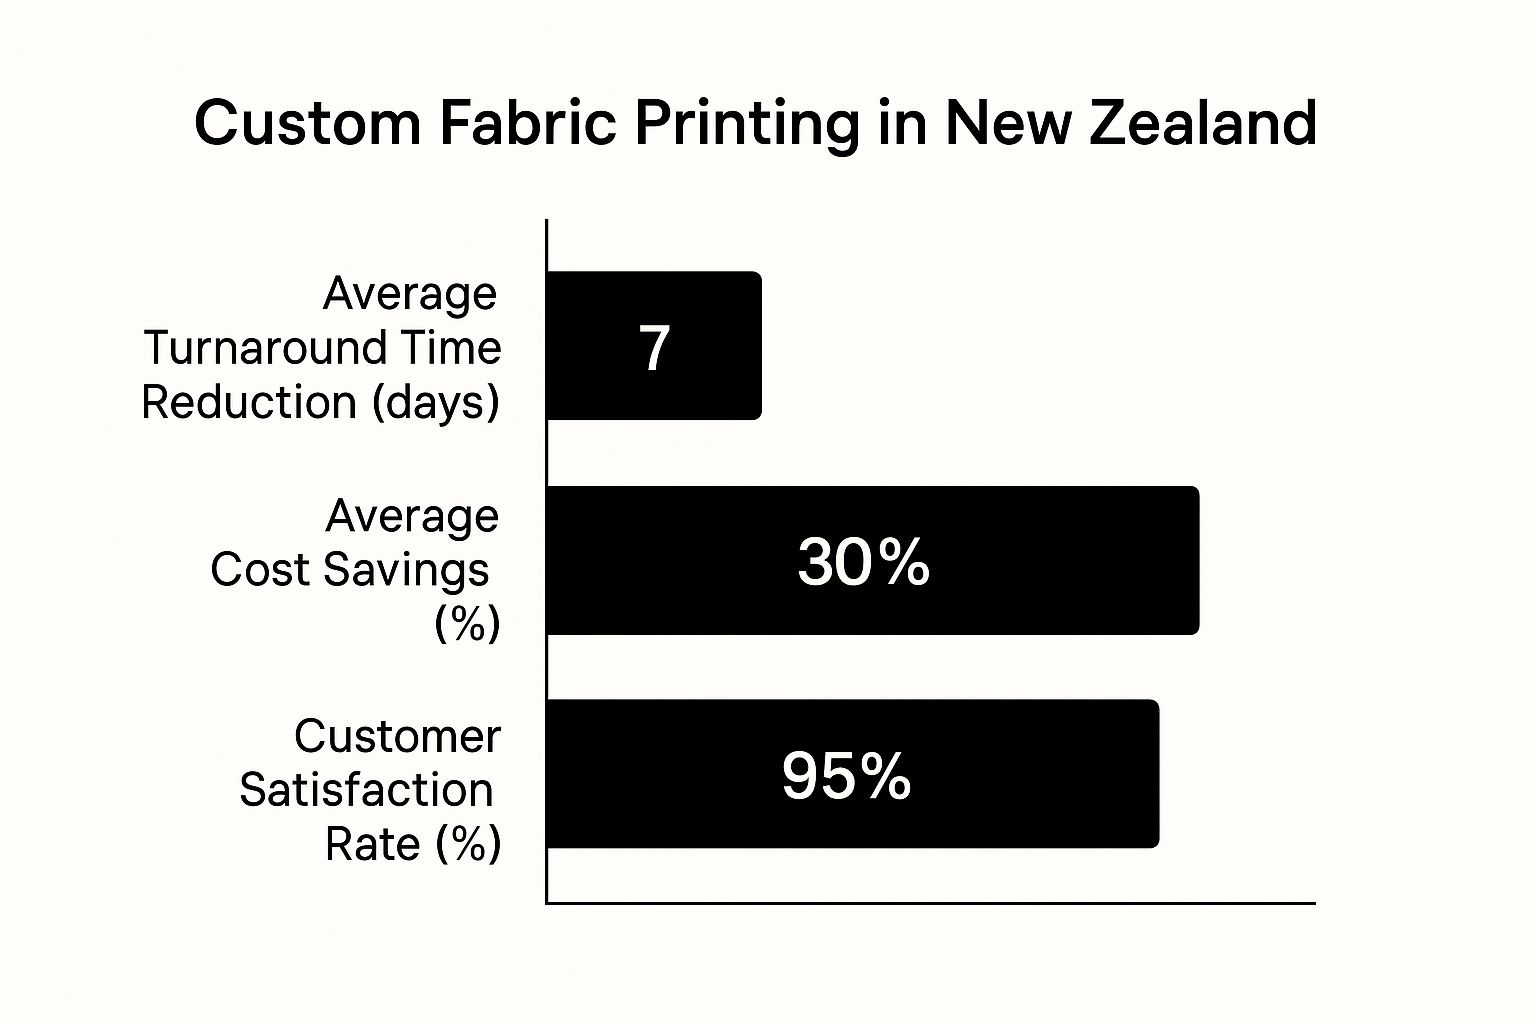
It's true that the wider printing industry has had a tough run lately, but the world of custom textiles is really bucking that trend. While the overall New Zealand printing sector, which includes around 799 businesses, has seen revenues drop by an average of 5.4% each year for the past five years, custom fabric is a different story.
This niche taps right into the growing global hunger for products that are personalised, unique, and made with care. You can dig deeper into these trends and learn more about the NZ printing industry on ibisworld.com.
This demand creates a massive opportunity for Kiwi creators. By going with custom-printed fabric, you're not just buying a product; you’re creating something that has a story. This guide is here to give you the confidence to navigate the whole process, from that first spark of an idea to holding the finished textile in your hands.
The real magic of custom fabric printing in NZ is that moment you see a personal idea become a physical object you can actually hold. It’s that perfect bridge between digital creativity and handcrafted quality—something mass production can never quite replicate.
Here's what this process empowers you to do:
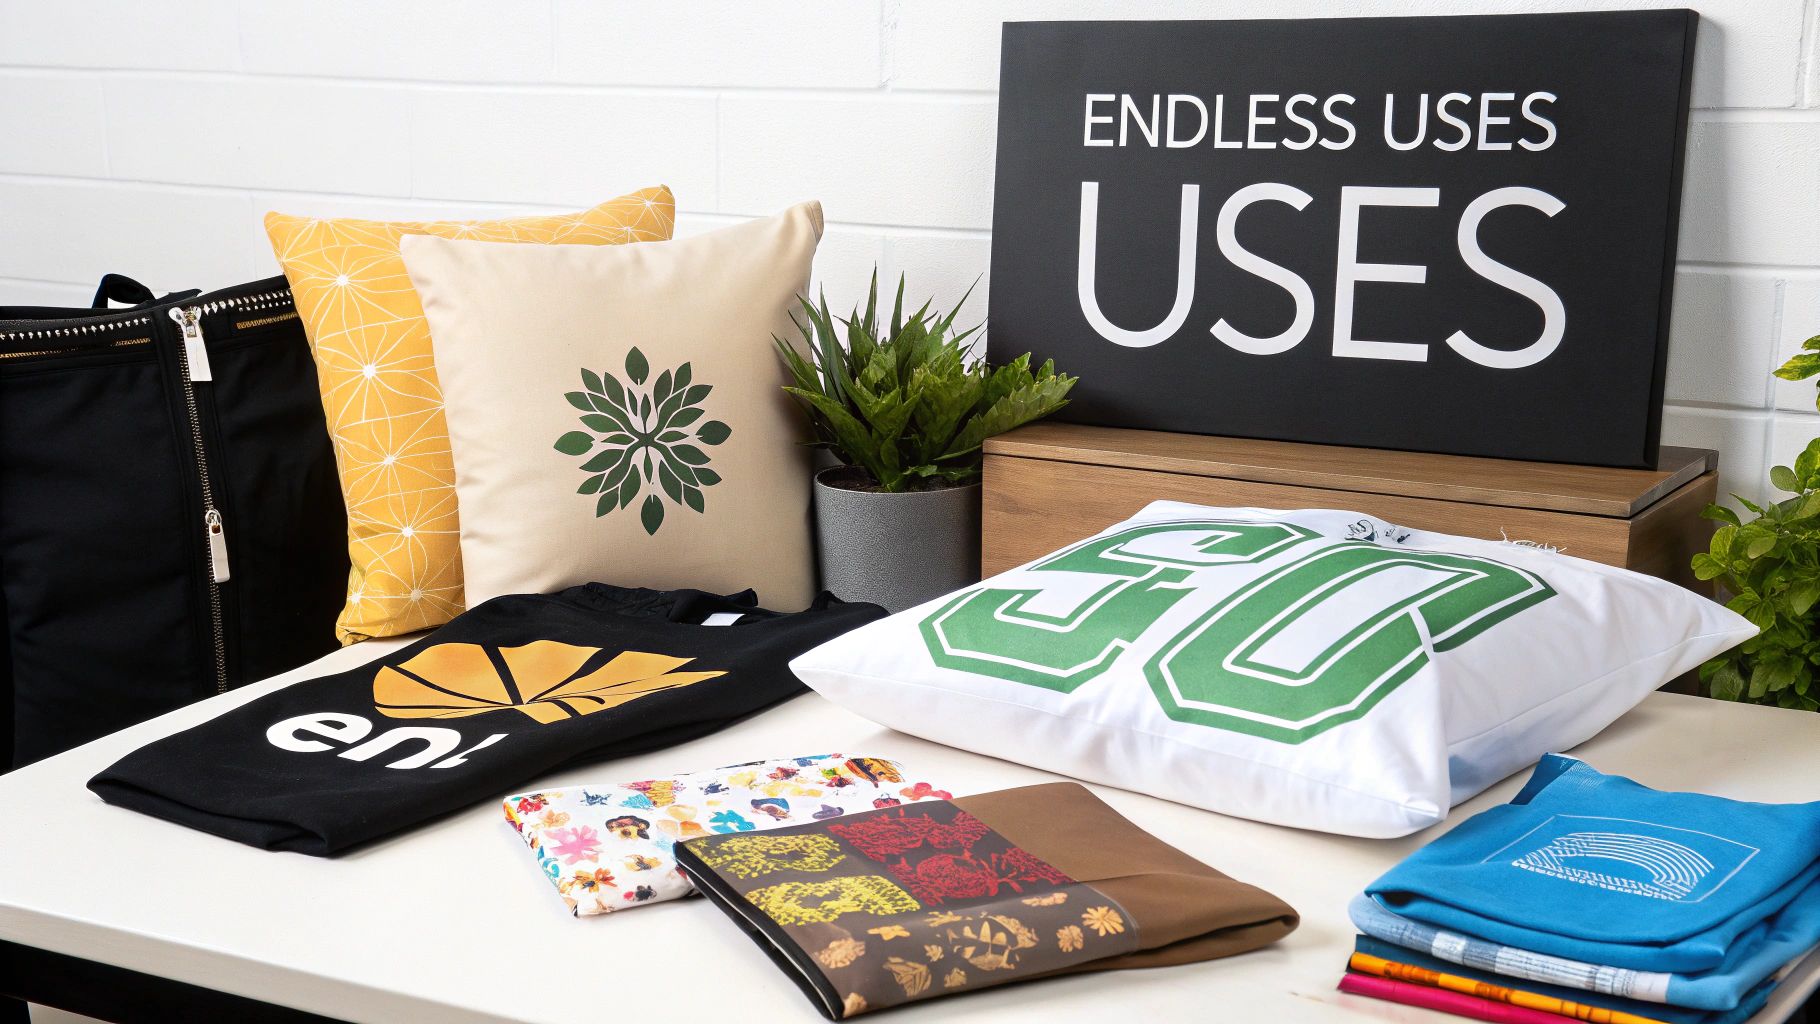
- Create Something Truly Unique: Stand out from the crowd with designs that are exclusively yours, whether for a clothing line, home furnishings, or a special art project.
- Guarantee Quality and Feel: By choosing the right fabric base and printer, you get to control the final look, feel, and durability of your textile.
- Support Local Craftsmanship: Partnering with NZ-based printers helps sustain local jobs and skills right here in our own creative communities.
The next few sections will walk you through exactly how to get started.
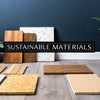
Selecting the Perfect Fabric for Your Project
The fabric you choose is the very soul of your project. This decision goes so much further than just looks; it's what determines the final product's feel, drape, and how well it holds up over time. Just think of the difference between a sturdy cotton canvas for a market tote and a flowing, delicate silk for a scarf—the material has to match the purpose.
Getting this right from the start ensures your design not only looks stunning but actually works the way you imagined. When it comes to custom fabric printing NZ, there's an exciting world of options, and each one brings its own unique character to the table.
Natural Fibres: The Heart of Many Projects
There's something special about natural fibres. They're often treasured for their breathability and the beautiful way they feel in your hands. They just have a certain life to them that synthetics sometimes can't replicate.
- Cotton: A true all-rounder. Cotton is loved for its softness and how well it soaks up ink, which means you get rich, deep colours. It’s a brilliant choice for everything from t-shirts and quilting projects to cushion covers.
- Linen: Known for its classic, slightly textured look and incredible strength, linen has that wonderful quality of getting softer with every wash. It’s the ideal choice for elegant tea towels, breezy summer clothing, and rustic-chic tablecloths. If you're looking for the perfect material, our detailed guide on the best linen fabric in NZ is a great place to start.
- Merino Wool: As a local hero, NZ merino is just exceptional. It’s incredibly soft, regulates temperature, and is naturally odour-resistant. Its fine fibres create a luxurious base for high-end clothing and soft baby accessories.
This just goes to show that a streamlined process can mean faster turnarounds and happier clients, making the whole experience much more rewarding for everyone involved.
Natural vs Synthetic Fabric Comparison for NZ Projects
Choosing between natural and synthetic materials can feel like a big decision. Both have their strengths, and the best choice really depends on what you're creating. This table breaks down some of the most common options to help you decide.
| Fabric Type | Best For | Feel & Drape | Colour Vibrancy | Care Instructions |
|---|---|---|---|---|
| Cotton | Apparel, quilting, homewares, bags | Soft, breathable, versatile drape | Excellent for rich, deep colours | Machine washable, can shrink |
| Linen | Tea towels, tablecloths, summer wear | Crisp, textured, gets softer over time | Beautiful, earthy tones; less vibrant than poly | Machine wash, prone to wrinkling |
| Merino Wool | High-end apparel, baby clothes | Very soft, fine, luxurious drape | Good, but can be more muted | Hand wash or gentle cycle, lay flat to dry |
| Polyester | Sportswear, swimwear, vibrant decor | Smooth, durable, can be drapey or stiff | Exceptional, photorealistic vibrancy | Very durable, machine washable, resists fading |
Ultimately, the goal is to match the fabric's properties with your project's needs, from the way it feels to how it will be cared for long-term.
The Power of Synthetic Fabrics
While natural fibres have an undeniable charm, synthetics bring their own set of powerful advantages to the party, especially when it comes to jaw-dropping colour and performance.
Polyester, for instance, is the absolute champion for sportswear and activewear. Why? Because printing methods like dye-sublimation create an incredibly vibrant, permanent bond with the fibres. The ink literally becomes part of the fabric. This means your design will never crack, peel, or fade, no matter how many intense workouts or washes it goes through. It’s perfect for things that need to be tough, like team jerseys or eye-catching leggings.
The key is to think about the end-use from the very beginning. A fabric that feels beautiful but can't handle a washing machine is a poor choice for a child's duvet cover. Conversely, a technical polyester won't have the graceful drape needed for a formal gown.
So, how do you make the final call? It really comes down to your vision. Ask yourself these questions:
- Feel: How do you want the final item to feel? Soft and cosy, or smooth and structured?
- Durability: Does it need to survive the washing machine and stand up to frequent use?
- Vibrancy: Is a punchy, ultra-bright colour palette absolutely essential for your design?
Answering these will point you toward the perfect material, making sure your custom-printed fabric is a complete success.
Prepping Your Design for Flawless Printing
Even the most brilliant design can fall flat if the digital file isn’t prepared correctly. A bit of thoughtful setup ensures your art translates beautifully onto fabric, saving you from the disappointment (and cost!) of a reprint.
This is the crucial step where you bridge the gap between your on-screen vision and the final textile. Think of it like a blueprint for a builder. A tiny error on paper can create big problems during construction, and the same goes for custom fabric printing NZ. Getting your file right from the get-go is everything.
Raster Versus Vector: What’s the Difference?
One of the first technical hurdles is getting your head around file formats. Your designs will generally fall into one of two camps: raster or vector.
Raster images, like JPEGs or PNGs, are built from a grid of tiny squares called pixels. They are perfect for detailed, photographic-style designs but have a fixed size. If you try to blow up a raster image too much, it becomes blurry and pixelated – you’re just stretching the same squares, after all.
On the other hand, vector images, which you’d create in a program like Adobe Illustrator, use mathematical paths instead of pixels. This means you can scale them to any size—from a tiny patch to a massive banner—without losing an ounce of quality. They’re ideal for logos, text, and graphics with crisp, clean lines.
For most fabric printing, especially for detailed patterns or photographic work, you’ll likely be working with raster files. The key takeaway is to create your raster design at the final print size from the very beginning to avoid any loss in quality.
The Non-Negotiable Rules of File Setup
Getting the technical details right isn’t just a suggestion; it’s essential for professional-quality printing. Pay close attention to these elements before you even think about hitting ‘save’.
-
Resolution is King: Always, always set your file's resolution to 300 DPI (dots per inch). This is the industry standard for high-quality printing. A lower resolution, like the 72 DPI common for web images, will look fuzzy and unprofessional on fabric.
-
Correct Colour Mode: Your computer screen uses an RGB (Red, Green, Blue) colour model, which is based on light. Printers, however, use a CMYK (Cyan, Magenta, Yellow, Black) model, which is based on ink. Designing in CMYK from the start gives you a much more accurate preview of how your colours will actually print. It helps manage expectations, as some vibrant screen colours simply don’t have a direct ink equivalent.
-
Accurate Dimensions: Double-check your canvas or artboard size matches the exact physical dimensions you want. If you need a design that is 1 metre wide, your digital file must be set to 1000mm wide at 300 DPI.
Creating Perfect Repeating Patterns
If you’re aiming for a continuous pattern, creating a seamless repeat is an art form in itself. You need to make sure the design elements on the right edge of your file line up perfectly with the left, and the top aligns with the bottom.
Most design software, like Adobe Photoshop or Affinity Photo, has specific tools and filters to help you create and test these repeating "tiles." A poorly executed repeat will show obvious lines or breaks in the pattern, completely ruining the illusion. A good trick is to tile your pattern on-screen to spot any mistakes before you send it off.
For a deeper dive into preparing your files, you can explore our guide on expert custom fabric printing techniques for more advanced tips.
Finally, when you're ready to save, most NZ printers prefer high-quality file formats that preserve all your hard work. Exporting your design as a TIFF or a high-quality, print-ready PDF is usually your safest bet. These formats are designed to maintain colour accuracy and resolution, giving your printer the best possible file to work with.
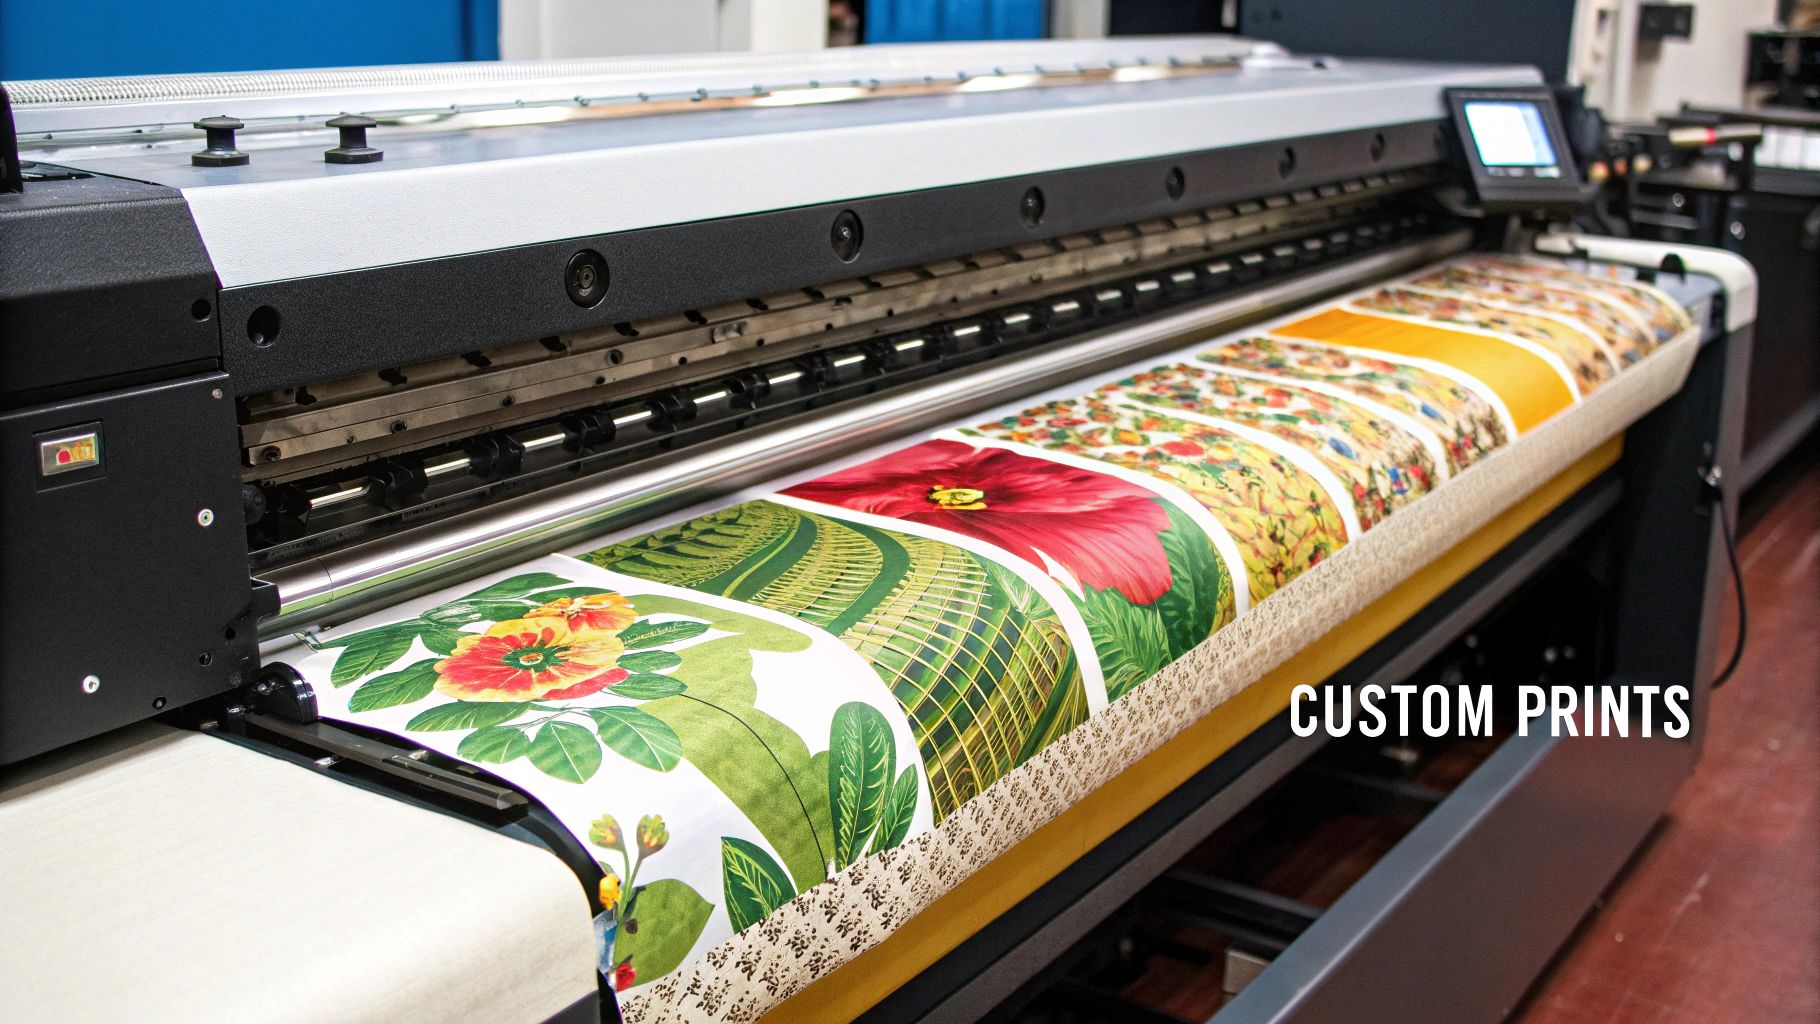
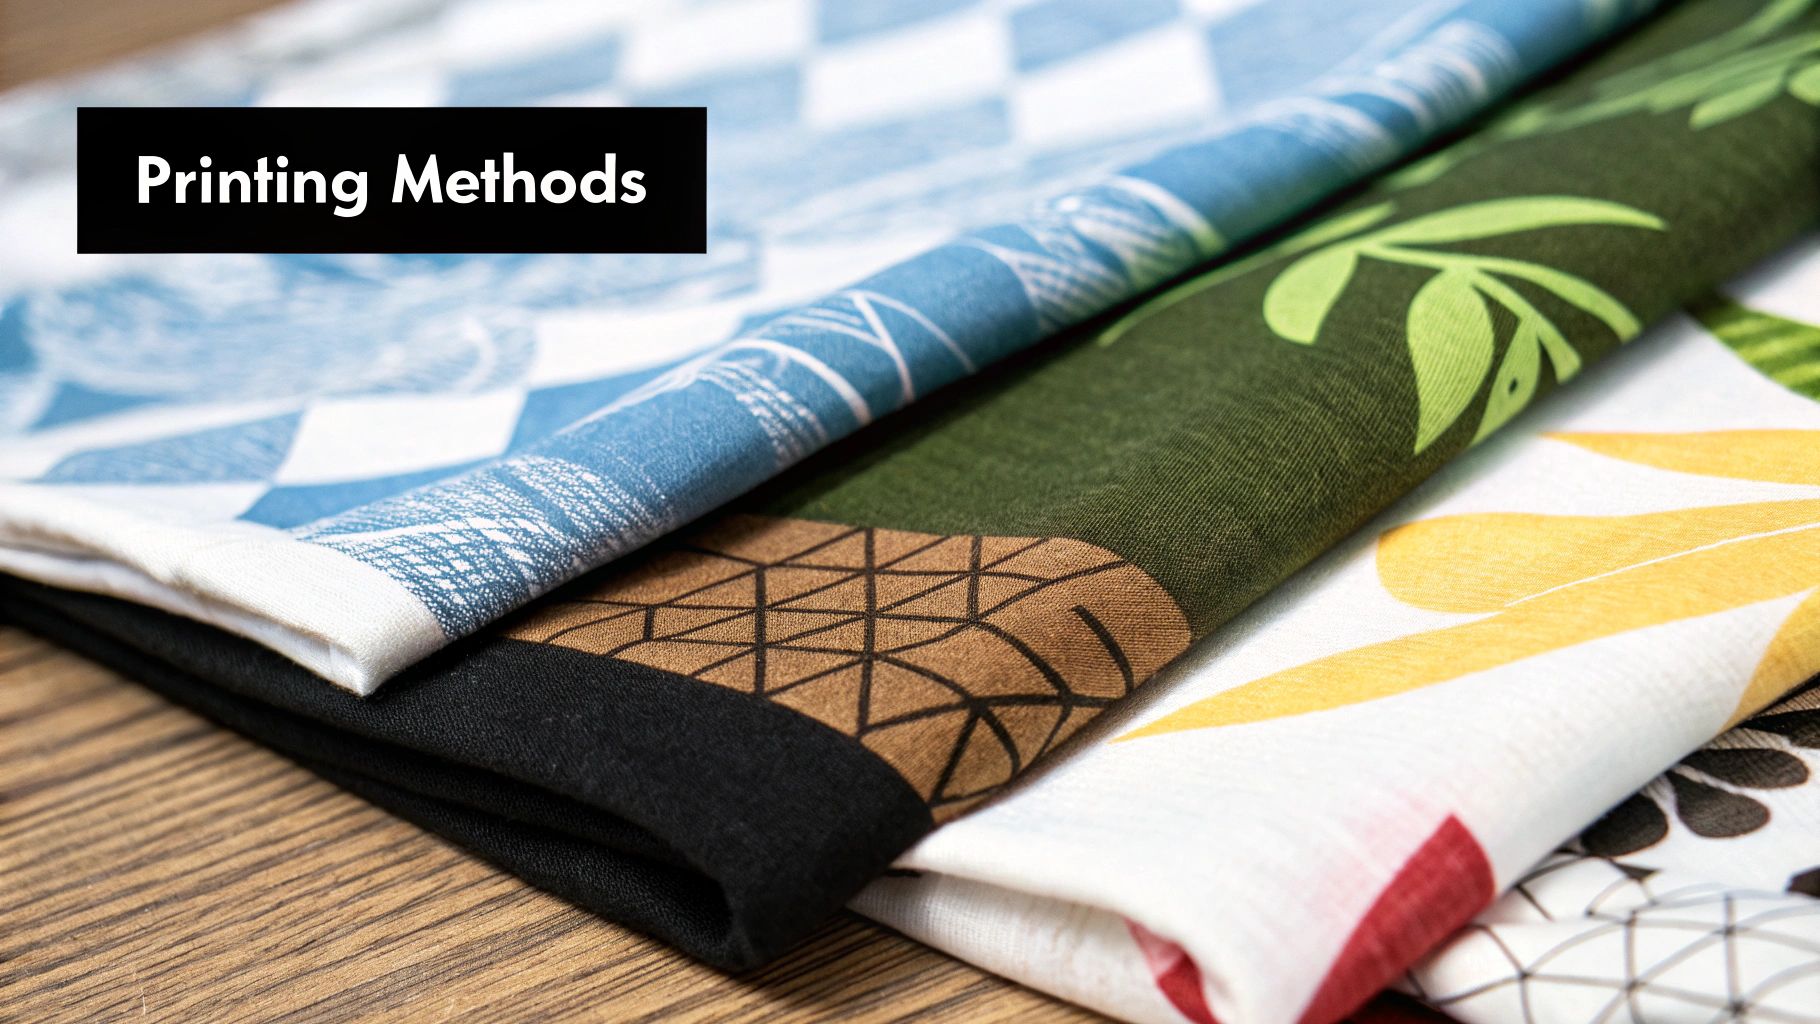
Choosing the Right Print Technology
Once you've got your design file perfected and picked out the perfect fabric, the next big decision is matching it all with the right printing technology. This choice is absolutely crucial—it dictates the final look, the feel, and even how well your fabric wears over time. It's the step that truly brings your vision for custom fabric printing in NZ to life.
In the world of modern textile printing, you'll hear about three main players: Direct-to-Garment (DTG), Dye-Sublimation, and the very popular newcomer, Direct-to-Film (DTF). Each one has its own strengths and is a better fit for different kinds of projects, fabrics, and budgets.
Direct to Garment (DTG) Printing
Think of DTG as a high-tech inkjet printer, but one that prints directly onto fabric instead of paper. It uses water-based inks that soak into the material, which is fantastic for creating those really intricate, full-colour designs with subtle gradients and fine details. It works beautifully on natural fibres like cotton, linen, and bamboo.
DTG is usually the go-to for one-off prints or small runs, like a custom-designed t-shirt or a detailed piece of art for a cushion cover. The print it leaves has a lovely soft "hand-feel," meaning it feels like it's part of the fabric itself, not a stiff layer sitting on top.
Dye-Sublimation for Peak Performance
Dye-sublimation is a different beast altogether. This clever process uses heat to turn solid ink into a gas, which then permeates and bonds with polyester fibres. The design literally becomes a part of the fabric.
This makes it the undisputed champion for sportswear, swimwear, and other performance gear. Why? Because the print will never crack, peel, or fade, no matter how much you stretch or wash it. The colours are incredibly bright and punchy, making it perfect for photorealistic images or bold, eye-catching patterns on synthetic fabrics.
Direct to Film (DTF) The Versatile Newcomer
Direct-to-Film (DTF) is a game-changing method that really bridges the gap between other technologies. The process involves printing your design onto a special film first, which is then heat-pressed onto the fabric. The result is a vibrant, durable transfer that can be applied to a huge range of materials—cotton, polyester, blends, and even tricky surfaces like leather.
DTF is quickly gaining ground because it solves some of the limitations of the other methods. You get the brilliant, vivid colours of dye-sublimation, but it works on all the natural fibres that DTG is known for. This boom in versatile printing is part of a much bigger picture; the global custom printing market hit USD 31.48 billion in 2023 and is only set to grow, driven by our love for personalised gear.
Choosing the right technology always comes down to balancing four things: your fabric type, the complexity of your design, the durability you need, and your budget. A good NZ printer will help guide you, but knowing the basics empowers you to ask the right questions and make confident decisions.
For an even more detailed comparison and to see how these methods stack up for different projects, our complete guide to digital fabric printing in NZ offers some deeper insights.
By aligning your project's needs with the right technology, you’re making sure the final product isn’t just beautiful, but also perfectly suited for whatever you have in mind.
Placing Your Order With a New Zealand Printer
Alright, so you’ve got your design ready and you’re excited to bring it to life on fabric. Placing that first order can feel a bit daunting, but honestly, Kiwi printers make the whole process surprisingly straightforward.
The key is simply knowing what information to have on hand before you even reach out. A little prep work makes everything smoother and ensures you get an accurate quote and a final product that’s exactly what you pictured.
Getting Your Details Ready
Before you hit 'send' on that quote request, pull together a few key details. Having this clear from the get-go saves a ton of back-and-forth emails and helps the printer nail down what you need.
- Your Fabric Choice: Be specific. Don't just say "cotton," say "cotton drill" or "silk crepe de chine." The exact material is crucial.
- The Quantity: How many metres are you after? Pricing for custom fabric printing NZ is almost always tiered. Ordering 10 metres will definitely be cheaper per metre than just a single metre.
- Your Design File: Have your print-ready file (a high-res TIFF or PDF at 300 DPI is perfect) ready to upload or attach.
My biggest piece of advice? Always, always order a sample swatch first. It’s a tiny upfront cost but it lets you see and feel exactly how your colours and scale look on the real fabric. This one small step can save you from a very expensive and disappointing bulk order down the line.
Timelines, Minimums, and Getting the Best Result
Once you've sent your details, the printer will come back with a quote and an estimated turnaround time. This usually covers everything from the moment you approve the final proof to when your fabric is printed, finished, and on its way to you.
You’ll also need to be aware of the Minimum Order Quantity (MOQ). Most printers have a minimum, often one metre, but it’s always best to check. Knowing the MOQ is essential for budgeting, whether you're a home sewer making one-off pieces or a small business planning a production run.
It’s no secret that the wider printing industry in New Zealand has changed a lot, with many businesses shifting focus from traditional media to digital. This has opened up some really exciting opportunities in niche markets like custom textiles. If you're interested in the industry shifts, researchandmarkets.com has a deep dive into the NZ printing sector. This same creative energy is what makes personalised fabric so special.
Don’t be shy about sharing your project's end goal with your printer. A good chat helps build a great relationship. If your fabric is for a commercial product, let them know! They might have fantastic advice on durability or colour-fastness.
Likewise, if you’re thinking of using a design for wall coverings, they can guide you toward the best material choices. It’s the same principle we explore when transforming a space with a personal touch in our guide to creating custom wallpaper in NZ. Clear communication is everything.
Your Fabric Printing Questions Answered
Diving into custom fabric printing for the first time can feel like there's a lot to learn. It's completely normal to have questions when you're aiming to get every detail just right.
We get asked a lot of great questions by creators all over the country. Think of this as your go-to cheat sheet for navigating the technical side of things and making your project a stunning success.
What’s the Best File Format for My Design?
For crisp, professional results, your printer will almost always ask for a high-resolution raster file like a TIFF or a print-ready PDF. The absolute golden rule here is to save your file at 300 DPI (dots per inch) at the exact size you want it printed. This is non-negotiable if you want to avoid any blurriness or pixelation.
If you’re creating a repeating pattern, take a moment to make sure your tile is truly seamless. That means checking that the design elements on all four edges—top, bottom, left, and right—line up perfectly to create a flawless, continuous look. It’s always smart to pop onto your chosen printer’s website and double-check their specific file requirements before you hit upload.
How Much Does Custom Fabric Printing Cost in NZ?
Honestly, the cost can vary quite a bit. It all comes down to the fabric you choose, the printing method used, and how much you’re ordering. As a general guide, natural fibres like pure silk or merino wool will have a higher price per metre than something like a versatile cotton or polyester.
Your final price is usually worked out per metre. The good news? You'll almost always see that cost per metre drop as your order volume goes up. Always ask for a detailed quote that breaks down everything, and we can't recommend this enough: order a sample swatch first. It's the best way to confirm the quality before you commit to a big run.
Can I Print on Any Fabric I Want?
While today's printing tech is incredibly clever, not every fabric works with every print method. This is a really important point to get your head around.
- Dye-sublimation, for example, gives you those stunning, permanent colours but it only works on fabrics with a high polyester content.
- Direct-to-Garment (DTG) printing, on the other hand, is the star performer on natural fibres like cotton, linen, and bamboo.
Your NZ printer will have a carefully selected range of 'print-ready' fabrics they know and trust to produce fantastic results. If you’re set on supplying your own material, you absolutely must chat with them first to see if it’s compatible. It’ll save you a world of disappointment later on.
What’s a Typical Turnaround Time in New Zealand?
Turnaround times can swing from just a few business days to a couple of weeks. It really depends on how busy the printer is, the size of your order, and the printing process involved.
A small, simple order might be ready in 5-7 working days. For a large or more complex project, you might be looking at 2-3 weeks from the moment you approve the proof to when it’s dispatched. If you’re working towards a specific deadline, make sure you confirm the estimated timeline with your printer right when you place the order.
Ready to see your ideas come to life on beautiful, high-quality textiles? At Maak Home, we bring together decades of experience with sustainable, on-demand digital printing, right here in New Zealand. Explore our range of custom fabrics and start your project today.


